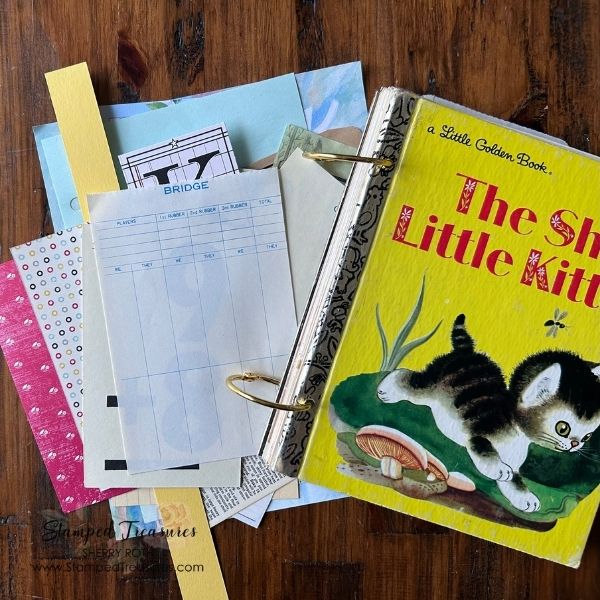
Creating Pockets & Adding Pages
We’re continuing our Little Golden Book alteration, and this is where the project really starts to come together! In the first video of this series, I shared the supplies I pulled from my stash and showed you how I carefully disassembled the book while keeping as much of the original storybook intact as possible. If you missed that video, you can find it here.
Now it’s time to start building the inside of the journal.
Creating Pockets
Pockets are one of my favourite elements to add to journals because they give you a place to tuck in all those little things that don’t necessarily have another home. And they add a nice pop of colour to your journal. There are so many ways to make them but this is how I like to make them.
Take a 12″ x 12″ piece of pattern paper and cut it to 6-1/2″ x 12″ and then score at the same height as your book (usually 7-7/8″). Then you can use a circle punch to notch the pocket, and glue up the two short sides and you’ve got a pocket!
From the leftover piece of pattern paper, I cut a 7-7/8″ piece, which will end up being another page in the journal. The scrap, I save for embellishing or tuck into one of the pockets in the journal for some added colour.
In addition to the colourful pattern paper pockets, I also use some of the papers and book pages that I gathered from my stash. You don’t have to make every pocket the same size or style. Here are some ideas:
- An envelope
- A folded book page
- A larger pocket with a smaller pocket layered on top
- A piece of packaging or a vintage paper bag
- An envelope with the flap adhered to the back of another page in the journal so that it flips out
- Scraps layered together to create a collage pocket
This is also a great opportunity to use pieces that aren’t quite big enough for a full journal page.
Preparing the Pages
Before adding everything to the journal, I need to ensure that all the pages will inside the journal which means 6-1/2″ x 7-7/8″ or smaller. Don’t feel like all the pages need to be the same size. I think part of the charm of junk journals is the variety of page sizes and styles.
Once you have all the pages folded or cut to size, it’s time to add the pages to the book.
Adding the Pages to the Book
At this point, you can decide if you want to have the whole story together and where you’d like it… all at the front, or at the back. Or if you’d like it mixed in with your other pages. Then you can just start adding your pages to the rings in the order you’d like.
I like to keep the original storybook pages and add in the extra pages around them. The goal is to create a layered book where the original story remains part of the finished design. I like to mix up the pages so that not all the lined paper is together and there’s a nice variety throughout the journal. Some pages are simply added as writing space. Others become the foundation for pockets, tuck spots and embellishments that I’ll add later.
This is where all of those pieces begin to feel like an actual journal rather than a collection of papers. No need to feel like every page needs to be completely finished at this stage. It’s okay to build the journal in layers.
Sometimes I know exactly what a page needs. Other times I leave it relatively plain and come back to it once I can see the rest of the journal taking shape.
Don’t Overthink It!
If you’ve never altered a book before, this is the part where it can be tempting to worry about doing it “right.” Don’t! There really isn’t one correct way to create an altered book. Your book might have lots of pockets. Or maybe just a few. You might use beautiful scrapbook papers, vintage papers, scraps, envelopes or a combination of everything. You might leave large portions of the original story untouched, or you might cover more of the pages with your own designs. The fun is in making it yours.
And if something doesn’t work? That’s okay too. Add another layer, cover it with a piece of paper or turn it into something completely different.
Watch Part 2
In part 2 of my Little Golden Book Altered Journal series, I’m sharing how I create the pockets, prep the additional pages and begin assembling everything into the book.
And this is just the next step! We still need to add layers, decorate the pages and bring the whole journal together.
If you’re following along, grab your own Little Golden Book and start digging through your stash. You might be surprised by just how many things you already have that would be perfect for this project.
Until next time,



Hi Sheri, I actually made my first junk journal ever, following your video tutorial…I am thrilled how it came out! Your directions and tips were spot on, not intimidating to me:) I bought several Golden Books and the one I made was a Taylor Swift journal. They also have Dolly Pardon and other celebrities…didn’t know that! Thank you for taking the time to share your creativity on your blog…I don’t think I would have attempted such a creation without your easy-going and “can-do” personality and videos.
I’m so happy to hear that about your first junk journal! Hopefully this is just the beginning and you’ll be making many more.
Sherry