If you’ve ever looked at your paper stash and thought “I love all of this… but none of it is working together” or “what am I going to do with all these scraps?”, a masterboard might just become your new best friend.
A masterboard is a single, large sheet created by layering papers, scraps, images, stamps, and mixed-media elements into one background. The magic happens after it’s finished—when you cut it apart and use the pieces across multiple projects.
Instead of starting from scratch every time, you’re designing once and creating many times.
Let’s break down what makes masterboards so powerful and how to use them for card making, scrapbooking, and junk journaling.
Why Create a Collage Masterboard?
Masterboards are loved by paper crafters because they:
- Use up scraps (hello, guilt-free crafting!)
- Create instant coordination across projects
- Spark creativity when your mojo is low
- Save time when batch-creating
- Encourage playful, pressure-free experimentation
There’s no right or wrong here—messy, layered, imperfect boards often create the best results.
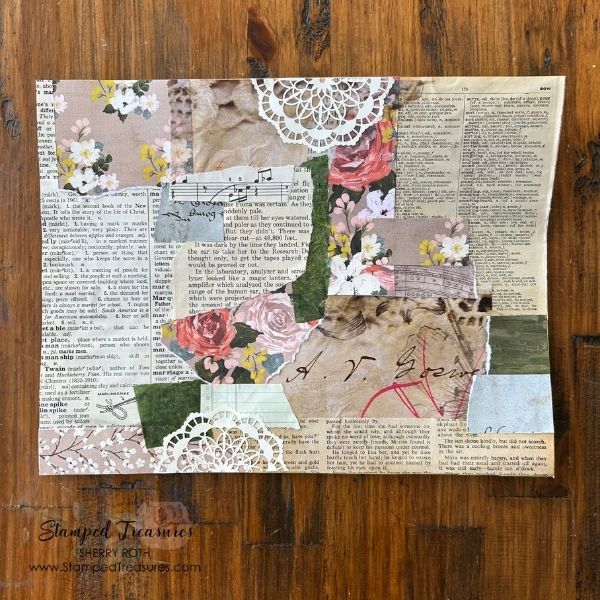
This masterboard is with the first layer – all the papers. It still needs stickers, stamps, stencilling, sprays, paint or splatters.
How to Create a Collage Masterboard
- Start with a base. This can be card stock, mixed media paper, patterned paper, old book pages, magazine pages or ledger paper. Anything will work!
- Then layer freely. You can use anything for layering. Here are some examples: patterned paper scraps; fussy-cut or die cut images; stamps; stickers; washi tape; tissue paper; paint, ink, or sprays; text or labels.
- Tips for success.
- Work without a final project in mind
- Overlap elements generously
- Vary scale (small bits + bold focal pieces)
- Repeat colours and themes for cohesion
- Don’t stop too early – full boards look better when cut apart than sparse ones.
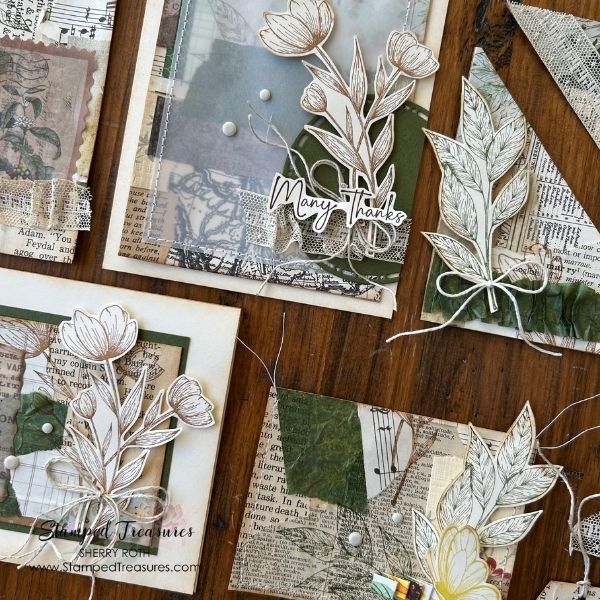
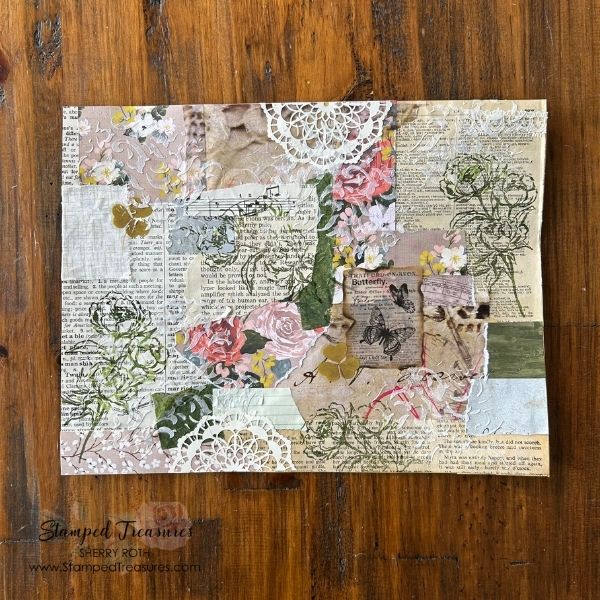
And after. This one has stamping, stencilled embossing paste, stickers and fabric. I want to try one with some paint! I think that would be fun.
Here’s a video that walks you through the process of creating a masterboard.
Once it’s dry, it’s time to cut it apart and start creating.
Using a Masterboard for Card Making
Masterboards are perfect for cards.
Here are a few ways to use them:
- Cut standard card fronts (A2, slimline, square)
- Crop small vignettes for focal panels
- Die-cut shapes or sentiments
- Create coordinated card sets
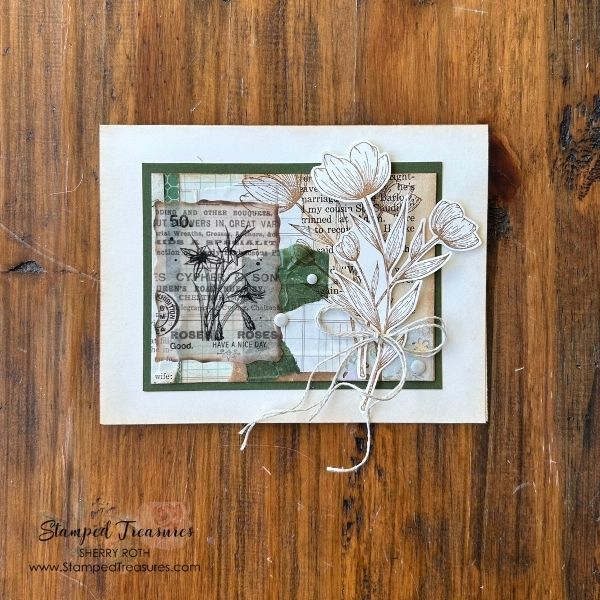
Because everything already matches, your cards look polished with very little effort. Add a sentiment, a bit of dimension, and you’re done.
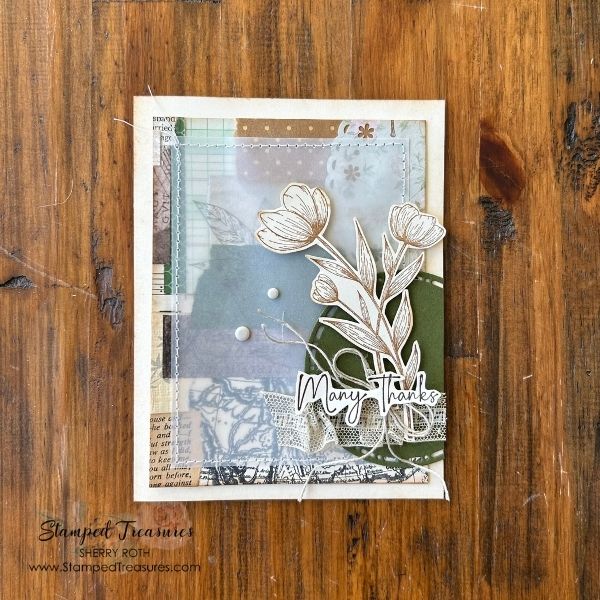
For this card I stitched on a piece of vellum to soften the business of it a bit.
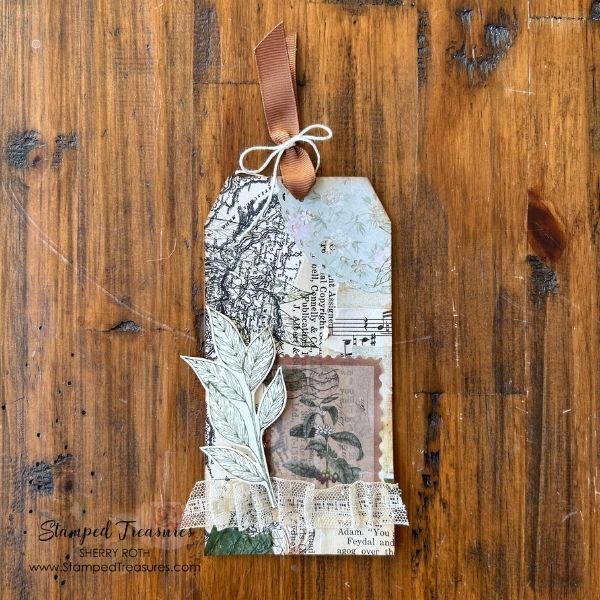
Using a Masterboard for Scrapbooking
If you love to scrapbook, here are some ways to use your masterboard on layouts:
- Border strips
- Die cut your title from the masterboard
- Use it as a base for your embellishment clusters
- Cut the board into sections and scatter them across your layout to create visual flow
- Travel layouts: incorporate maps and other memorabilia from your trip on your masterboard to make it even more personal
- Memory keeping: masterboards are perfect for all those bits and pieces we collect – like movie tickets, receipts and brochures.
When you use everyday things you’ve collected your pages instantly feel intentional and storytelling-rich.
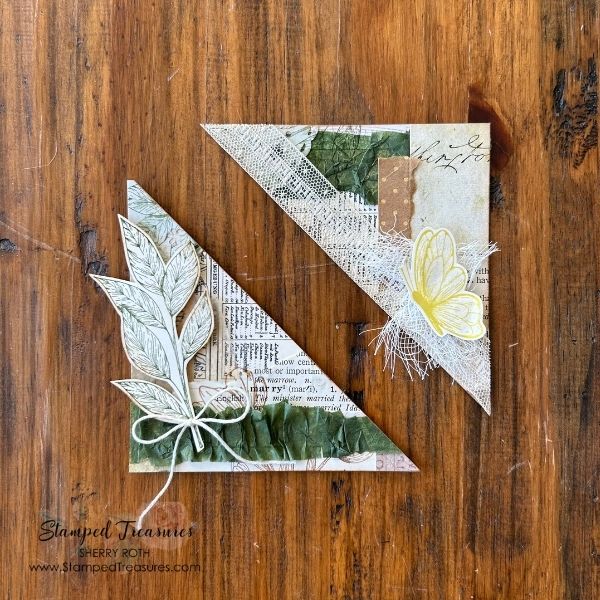
Using a Masterboard for Junk Journaling
Junk journalers—this is your playground.
Masterboards can become:
- Journal pages or spreads
- Tags and tuck spots
- Pockets and flips
- Cluster bases
Cut irregular shapes, tear edges, or layer pieces back into your journal for a beautifully cohesive, collected look.
One Board, Endless Possibilities
The real beauty of a collage masterboard is that nothing goes to waste. Even the tiniest leftover bits can become sentiment strips, mini embellishments or layered accents
So the next time your desk is covered in scraps, don’t clean them up…
Glue them down, step back, and let a masterboard do the heavy lifting.
Check out the video below for how I cut up my masterboards.
Until next time,


Leave a Reply