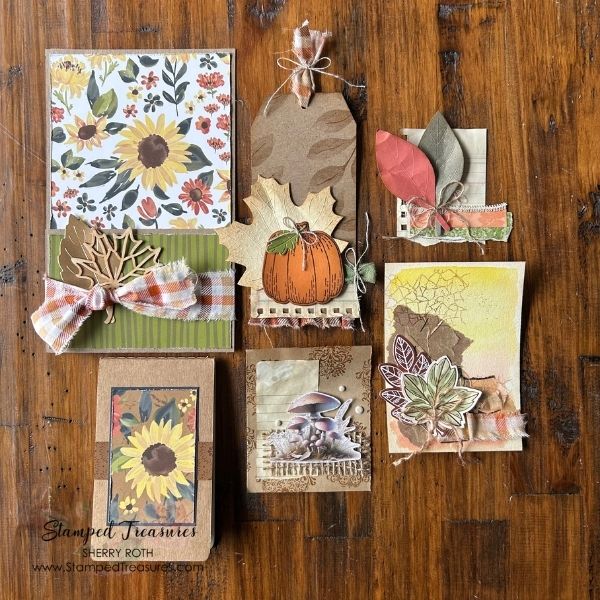
Easy Fall Ephemera Ideas for Journals, Cards & More
There’s something about fall that makes me want to slow down, pull out all the warm colours and little bits of texture in my craft room, and start making things just for the fun of it. This time, instead of reaching for a specific collection or coordinating set of products, I decided to see what I could create from the bits and pieces I already had on hand.
The result? A little collection of fall-inspired ephemera that can be used in so many different ways.
I pulled together scraps from my stash, some fall fabric, die-cut leaves that were leftover from another kit, and a few basic stamping supplies. I’ve shared a video showing exactly how I made them, but here are some ideas for how you can use this type of handmade ephemera in your own projects.
What Is Ephemera?
Ephemera can be just about anything you want it to be. In paper crafting, I think of it as those little decorative or interactive pieces that can be tucked into, added to, or layered onto a project. Think tags, pockets, labels, journal cards, tickets, tabs, clusters and little pieces of decorated paper. They don’t necessarily have to serve a particular purpose, either. Sometimes a small piece tucked into a journal simply adds a bit of colour and texture. That’s what makes making your own ephemera so much fun.
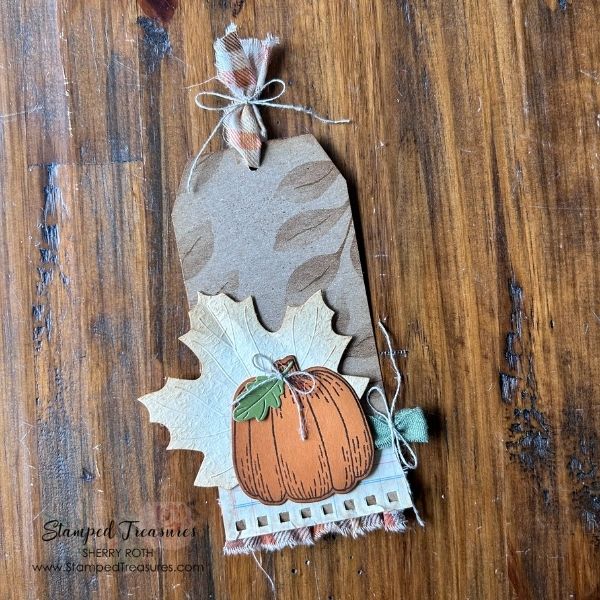
Start With the Scraps
For my fall pieces, I started by digging through my scrap bin. I wasn’t looking for perfectly coordinated papers. In fact, I think some of the charm comes from combining papers that might not have been designed to go together but happen to work beautifully once they’re layered.
Here are a few ideas of what to look for:
- Small pieces of patterned paper
- Cardstock scraps
- Book pages
- Vellum
- Previously stamped pieces
- Leftover die cuts
- Bits of packaging
- Small pieces of specialty paper
- Scraps of ribbon, twine or trim
Fall is particularly forgiving when it comes to colour. Browns, creams, oranges, yellows, greens and muted reds can all work together, even when they come from completely different sources.
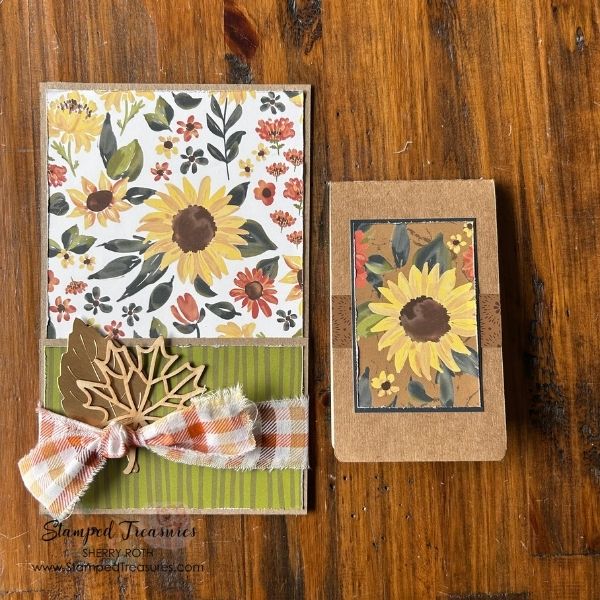
Add Some Fabric
One of my favourite additions to these pieces was fabric. I picked up some fall patterned fabric at the dollar store a few weeks ago and hadn’t yet used it. This was the perfect opportunity. You can glue a small piece onto a tag, stitch it to a journal card, layer it behind a die cut or simply let the edges fray a little for a softer, more relaxed look. And don’t feel like the fabric needs to be perfectly cut. A torn or slightly wonky edge can actually make the piece feel more interesting. If you have fabric scraps left over from another project, this is a great way to give them another life.
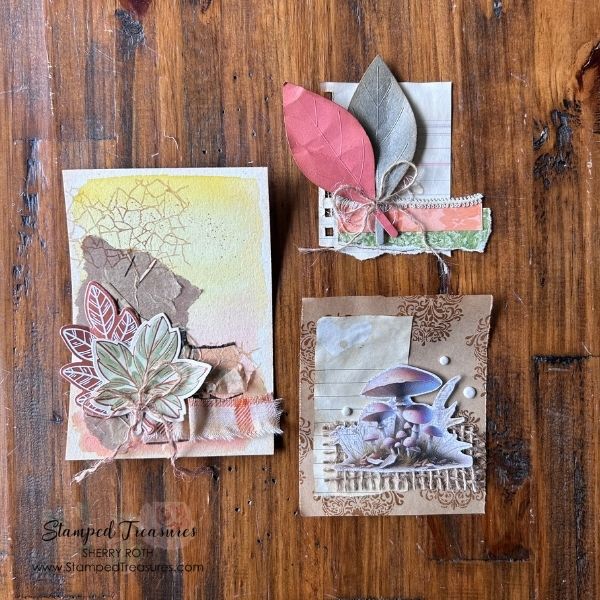
Try a Colour-Wash Background
For one of my pieces, I created a simple colour-wash background before adding the other elements. There’s no need to make this complicated. A little diluted ink brushed across cardstock can create a soft background can offer interest without overwhelming the other elements. I especially like this technique for fall because the slightly uneven colour adds to that worn, vintage feeling. You can leave areas lighter and darker, let a little of the cardstock show through, or add more colour around the edges. The goal isn’t perfection.
And Then… See Where They Take You
Once you have a small collection of handmade ephemera, you can start using it wherever inspiration strikes.
- Add it to a journal – Tuck a tag into a pocket, layer a cluster onto a page, create a little journaling card or simply glue a piece onto a page as decoration. Because some of these pieces are relatively small, they’re also a great way to add detail without covering up everything else on the page.
- Make a card – A little ephemera cluster can easily become the focal point of a handmade card. Layer a few pieces onto a card base, add a sentiment and you’ve got a card with lots of texture and dimension without needing an elaborate design.
- Use them in a scrapbook – Small clusters are perfect for scrapbook pages, particularly around photos. They can help tie different colours together or fill an empty area without making the page feel too busy.
- Create tuck-ins – If you’re making journals or mini albums, these pieces can become little things for the recipient to discover. Tuck a tag into a pocket, add a journal card behind a belly band or create a small piece that can be removed and used elsewhere.
- Make a stash of them for later – sometimes you don’t need a project in mind at all. Make a handful of pieces while you’re in the mood and keep them together in a little envelope or box. Then, when you’re working on a journal, card or scrapbook page later, you’ll have a collection of ready-made pieces to choose from.
Watch the Video
I’ve put together a video showing how I made these fall ephemera pieces, including how I combined the scraps, fabric, leftover die cuts, stamping and colour-wash backgrounds. You can follow along with the process, but don’t feel like you need to recreate my pieces exactly. Instead, take a look through your own stash and see what you have. You might find that the perfect fall ephemera is already sitting in your scrap bin.
A Little Stash Challenge
Before you buy anything specifically for your next fall project, spend a few minutes shopping your craft room. Pull out your scraps. Look through your leftover die cuts. Check your fabric basket. Flip through those stamped pieces you’ve saved because they were “too good to throw away.” Then start combining them.
There doesn’t need to be a plan. Make a few tags. Try some layered pieces. Add a leaf to a scrap of paper. Stamp over something. Tear an edge. Add a little fabric. You may end up with exactly what you needed for your next project — or with a collection of little pieces that inspire you to make something entirely different.
And honestly, I think that’s one of the best things about creating with your stash.
Until next time,

Supply List
Click on any of the images below to shop my Canadian online store or to find out more information about any of these products. In addition to these I also used Fabri-Tac glue; retired embellishments, a piece of a file folder and scraps from my scrap bin.
![Echoes Of Detail Photopolymer Stamp Set [ 170046 ]](https://assets1.tamsnetwork.com/images/EC042017NF/170046s.jpg "Echoes Of Detail Photopolymer Stamp Set [ 170046 ]")
![Botanical Glow Photopolymer Stamp Set [ 170054 ]](https://assets1.tamsnetwork.com/images/EC042017NF/170054s.jpg "Botanical Glow Photopolymer Stamp Set [ 170054 ]")
![Softly Woven 3 D Embossing Folder [ 168466 ]](https://assets1.tamsnetwork.com/images/EC042017NF/168466s.jpg "Softly Woven 3 D Embossing Folder [ 168466 ]")
![Fluid 100 Watercolor Paper [ 149612 ]](https://assets1.tamsnetwork.com/images/EC042017NF/149612s.jpg "Fluid 100 Watercolor Paper [ 149612 ]")
![Water Painters [ 168253 ]](https://assets1.tamsnetwork.com/images/EC042017NF/168253s.jpg "Water Painters [ 168253 ]")
![Blending Brushes [ 153611 ]](https://assets1.tamsnetwork.com/images/EC042017NF/153611s.jpg "Blending Brushes [ 153611 ]")
![Pecan Pie Stampin’ Blends Combo Pack [ 161674 ]](https://assets1.tamsnetwork.com/images/EC042017NF/161674s.jpg "Pecan Pie Stampin’ Blends Combo Pack [ 161674 ]")
![Pecan Pie Classic Stampin' Pad [ 161665 ]](https://assets1.tamsnetwork.com/images/EC042017NF/161665s.jpg "Pecan Pie Classic Stampin' Pad [ 161665 ]")
![Crushed Curry Classic Stampin' Pad [ 147087 ]](https://assets1.tamsnetwork.com/images/EC042017NF/147087s.jpg "Crushed Curry Classic Stampin' Pad [ 147087 ]")
![Cajun Craze Classic Stampin' Pad [ 147085 ]](https://assets1.tamsnetwork.com/images/EC042017NF/147085s.jpg "Cajun Craze Classic Stampin' Pad [ 147085 ]")
![Stampin' Positioner [ 167768 ]](https://assets1.tamsnetwork.com/images/EC042017NF/167768s.jpg "Stampin' Positioner [ 167768 ]")
![Stampin' Cut & Emboss Machine [ 149653 ]](https://assets1.tamsnetwork.com/images/EC042017NF/149653s.jpg "Stampin' Cut & Emboss Machine [ 149653 ]")


Leave a Reply