If you’ve ever looked at a card kit and thought, “This is cute… but I don’t need more cards,” you are not alone.
Today I’m sharing one of my favourite ways to stretch your supplies and get more value from a kit—by turning a card kit into a beautiful, functional mini album!
Why Turn a Card Kit into a Mini Album?
Card kits are designed to be convenient—but they’re also incredibly versatile.
When you think beyond the instructions, you’ll find they include:
- coordinated papers
- embellishments
- pre-designed elements
- and often a cohesive theme perfect for storytelling
Which makes them ideal for mini albums!
Instead of ending up with a stack of cards, you can create something that:
- tells a story
- holds photos and memories
- and becomes a keepsake you’ll actually flip through
What You’ll Need
The best part? You likely already have everything.
- A card kit (any kind will work!)
- Adhesive
- A trimmer or scissors
That’s it—no need to overcomplicate it.
How to Turn a Card Kit into a Mini Album
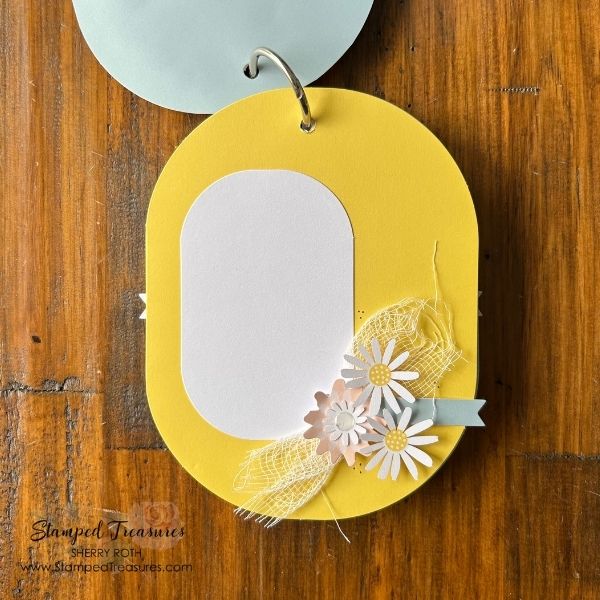
- Start with Your Card Bases. Your card bases become the foundation of your album. Folded cards can act as pages or can be trimmed down, or in half like I did for today’s project.
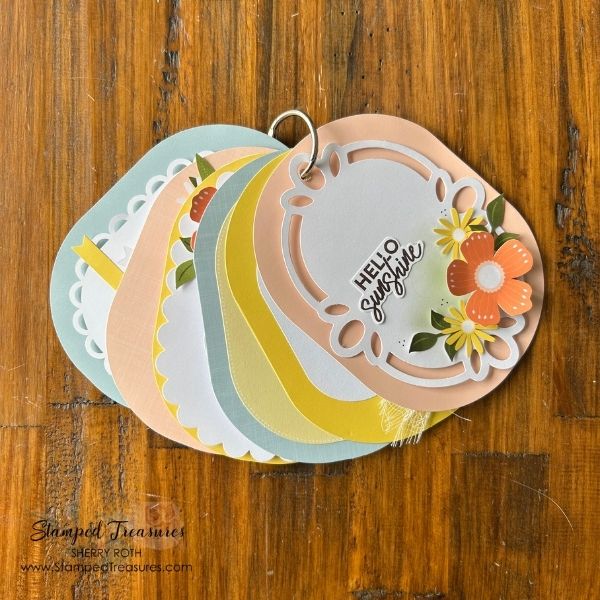
- Build Your Page Structure. Decide how you want your album to come together. Do you want it bound with rings? Have an accordion fold? Or a simple staple or stitched spine? Keep it simple—this is about using what you have, not making it complicated.
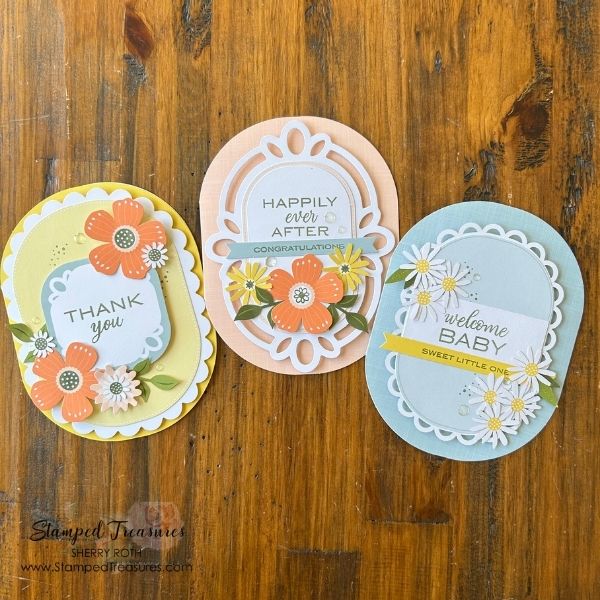
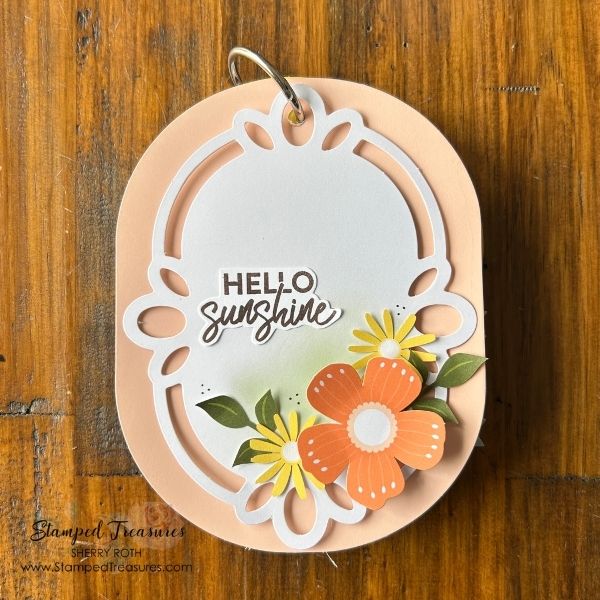
- Use Card Fronts as Focal Points. Those pre-designed card fronts – they are instant page designs. Use them as page designs, tuck spots or pockets or as photo mats. This saves time while still looking polished.
- Add Layers and use the leftovers. Now it’s time to bring in all those extra bits from the kit: the die cuts, tags, sentiment pieces and any leftover scraps. Layer them to create clusters, journaling spots or interactive elements like flips or pockets.
- Make It Your Own. This is the fun part. Add photos, handwritten notes or extra pieces from your stash. This is where you can create something uniquely yours.
Why I Love This Project
This kind of project checks all my favourite boxes:
- It helps you use your stash
- It gives scraps and leftovers a purpose
- It stretches the value of your supplies
- And it creates something meaningful—not just more “stuff”
It’s a reminder that you don’t need more products—you just need a fresh perspective.

Next time you reach for a card kit, ask yourself: What else could this become? Because sometimes the best projects aren’t the ones we planned—they’re the ones we reimagined.
And this mini album is proof that a simple kit can turn into something truly special.
Want to see exactly how this comes together? Be sure to watch the full step-by-step video below.
Until next time,

Supply List
Click on any of the images below to shop my Canadian online store. In addition to these supplies, I also used a 1-1/4″ binder ring and some cheesecloth.
![Happy Happenings Kit (English) [ 167271 ]](https://assets1.tamsnetwork.com/images/EC042017NF/167271s.jpg "Happy Happenings Kit (English) [ 167271 ]")
![Exploring Nature Photopolymer Stamp Set (English) [ 166913 ]](https://assets1.tamsnetwork.com/images/EC042017NF/166913s.jpg "Exploring Nature Photopolymer Stamp Set (English) [ 166913 ]")
![Blending Brushes [ 153611 ]](https://assets1.tamsnetwork.com/images/EC042017NF/153611s.jpg "Blending Brushes [ 153611 ]")
![Tuxedo Black Memento Ink Pad [ 132708 ]](https://assets1.tamsnetwork.com/images/EC042017NF/132708s.jpg "Tuxedo Black Memento Ink Pad [ 132708 ]")
![Multipurpose Liquid Glue [ 110755 ]](https://assets1.tamsnetwork.com/images/EC042017NF/110755s.jpg "Multipurpose Liquid Glue [ 110755 ]")
![Paper Trimmer [ 152392 ]](https://assets1.tamsnetwork.com/images/EC042017NF/152392s.jpg "Paper Trimmer [ 152392 ]")


Leave a Reply