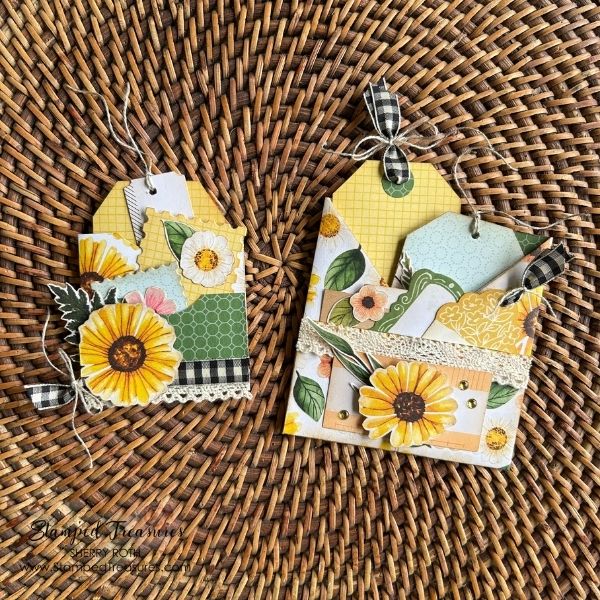
Today I’m sharing two simple pocket ideas that can be used in journals, on (or in) cards, on scrapbook layouts, on their own or in mini books. There are so many possibilities with these cute stuffed pockets!
These are also great projects to tackle some of the supplies in your stash. Pull out some pattern paper and coordinating ephemera, stamps & dies and have fun with it!
I share how to make these two pockets in the video below.
Pocket #1

The first pocket measures about 3-3/4″ x 3-3/4″ before you fill it. It’s created from a 5-1/2″ x 8-1/4″ piece of pattern paper. However you can create this type of pocket with any sized rectangle. Possibly even a square, although I haven’t tried a square.
You’ll find the measurements for the size I’m sharing here, below, but in the video (linked above) I share how you can make one in any size.
Measurements:
- Floral Impressions DSP (or any pattern paper): 5-1/2″ x 8-1/4″. Along the long side score at 2-1/4″ and 6″ and 1-3/4″ up from the bottom on the short side. Then fold the top two corners in to line up with the score lines. The video shows you how to do this:)
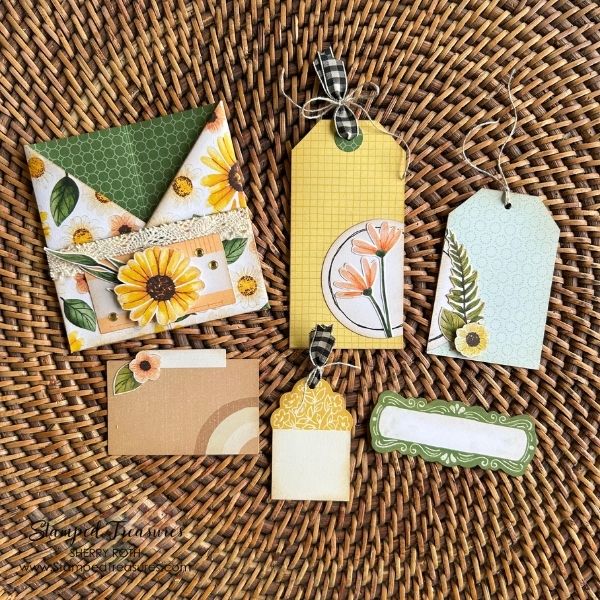
- Tags: Yellow tag is 2″ x 4″; Pool Party tag is 2″ x 3″, the rest of the tags are all ephemera pieces but you can use stamps and die to create your own tags and labels.
- Fussy cut images from the pattern paper
- Scraps of ribbon & twine
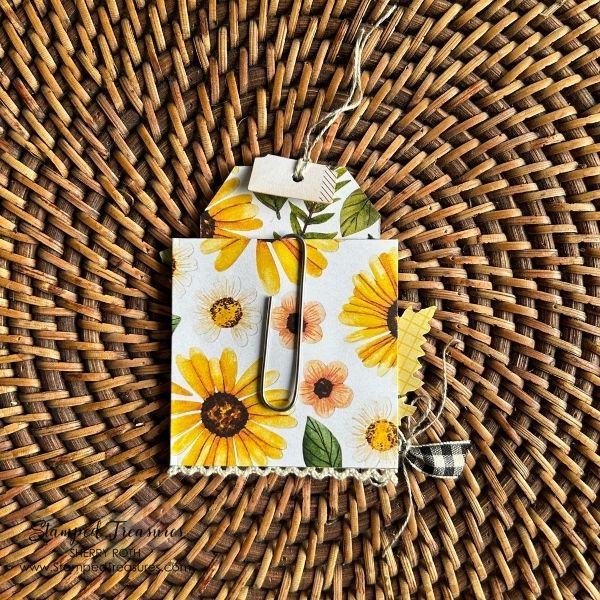
Pocket #2

The second pocket I’m sharing is actually a clip. It can clip into a journal, added to a pocket inside a card or turned into a gift card holder. Here’s a look at the back.
Measurements:
- Floral Impressions DSP (or any pattern paper): 2-1/2″ x 10-3/4″ (approximately); score at 2-1/2″ and fold, then fold that folded bit over and cut off the remaining piece. The remaining piece will be trimmed down to a 1-1/2″ pocket.
- Tags: 2″ x 3″ piece for the yellow tag; 1-3/4″ x 2-1/2″ die cut with 3rd smallest perennial postage rectangle; 1-3/4″ x 1-3/4″ piece die cut with smallest perennial postage square
- Fussy cut images
- scraps of ribbon/twine

It’s so fun playing around with scraps to create tiny little things to fit in the pockets.
This last photo is how I plan on using mine. I used the largest perennial postage rectangle and die cut it from some book paper, cut another partial piece from some lined notebook paper and stuck them together to create a pocket. My clip just slides right onto the pocket and leaves me with the back pocket to add a tag or something else.

I have been having so much fun playing around with these pockets! Be sure to watch the video for a few other ideas and how I’ve been using them.
Until next time,

Shopping List
Click on any of the images below to shop my Canadian online store or to find out more information about any of these products. In addition to these items, I also used the following: some ephemera tags (retired); a 1/8″ hole punch, some lace ribbon from Dollarama, large paper clips and some retired gold dots from my stash.
![Perennial Postage Dies [ 162607 ]](https://assets1.tamsnetwork.com/images/EC042017NF/162607s.jpg "Perennial Postage Dies [ 162607 ]")
![Floral Impressions 12" X 12" (30.5 X 30.5 Cm) Designer Series Paper [ 165603 ]](https://assets1.tamsnetwork.com/images/EC042017NF/165603s.jpg "Floral Impressions 12\" X 12\" (30.5 X 30.5 Cm) Designer Series Paper [ 165603 ]")
![Black & Very Vanilla 3/8" (1 Cm) Large Check Ribbon [ 161982 ]](https://assets1.tamsnetwork.com/images/EC042017NF/161982s.jpg "Black & Very Vanilla 3/8\" (1 Cm) Large Check Ribbon [ 161982 ]")
![Linen Thread [ 104199 ]](https://assets1.tamsnetwork.com/images/EC042017NF/104199s.jpg "Linen Thread [ 104199 ]")
![Blending Brushes [ 153611 ]](https://assets1.tamsnetwork.com/images/EC042017NF/153611s.jpg "Blending Brushes [ 153611 ]")
![Crumb Cake Classic Stampin' Pad [ 147116 ]](https://assets1.tamsnetwork.com/images/EC042017NF/147116s.jpg "Crumb Cake Classic Stampin' Pad [ 147116 ]")
![Multipurpose Liquid Glue [ 110755 ]](https://assets1.tamsnetwork.com/images/EC042017NF/110755s.jpg "Multipurpose Liquid Glue [ 110755 ]")
![Tear & Tape Adhesive [ 154031 ]](https://assets1.tamsnetwork.com/images/EC042017NF/154031s.jpg "Tear & Tape Adhesive [ 154031 ]")
![Paper Trimmer [ 152392 ]](https://assets1.tamsnetwork.com/images/EC042017NF/152392s.jpg "Paper Trimmer [ 152392 ]")
![Stampin' Cut & Emboss Machine [ 149653 ]](https://assets1.tamsnetwork.com/images/EC042017NF/149653s.jpg "Stampin' Cut & Emboss Machine [ 149653 ]")


thanks for this wonderful tutorial. I would love to post my project on a craft social and give you credit for the design. with your permission I would like to share thw measurements too. thanks in advance, Shirley from Vancouver Island