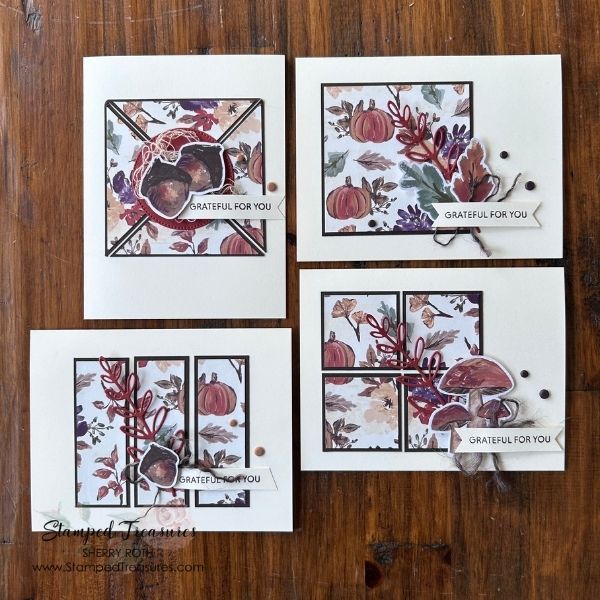
One Sheet Wonder with 6×6 Pattern Paper: Two Ways to Create Beautiful Cards
I love a good one sheet wonder, especially when it starts with something as simple as a 6″ x 6″ piece of pattern paper.
There’s something so satisfying about taking one small piece of pretty paper, cutting it into a few pieces, and turning it into a collection of cards. And the best part? You can keep the cards simple and quick, or take the exact same design and step it up with a few extra techniques.
For this project, I’m sharing two different versions of the same one sheet wonder design – one simple and one stepped up.
Starting with a 6″ x 6″ Piece of Pattern Paper
The idea behind this one sheet wonder is pretty simple: start with a single 6″ x 6″ piece of Designer Series Paper, or cut down a 12″ x 12″ to 6″ x 6″ like I did, and cut it into pieces that can be used to create multiple card fronts.
For my cards, I used Autumn Opulence Designer Series Paper from Stampin’ Up!. I especially love this paper for this project because it includes die-cut ephemera pieces that coordinate with the patterned paper. That makes decorating the cards incredibly easy! Instead of spending a lot of time figuring out what embellishments to add, I can simply choose a few of the coordinating pieces, add a greeting, some twine and a few embellishments, and the cards are finished.
And that is one of the things I love most about one sheet wonders: you don’t need a lot of supplies to make something beautiful.
Cutting Guide
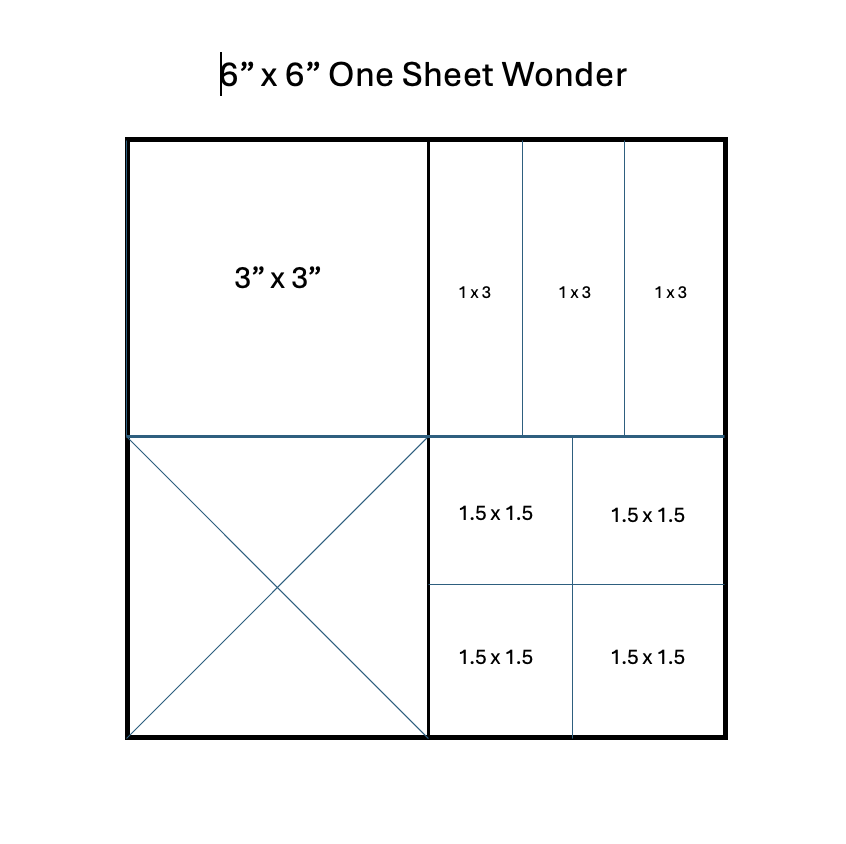
This is such a great one sheet wonder template. You are basically cutting your 6″ x 6″ piece into four 3″ x 3″ pieces. One will remain 3″ x 3″, another will be cut into three 1″ x 3″ strips, another into four 1-1/2″ squares and the last one cut diagonally into 4 triangles.
Additional Supplies:
- Card Bases: four 5-1/2″ x 8-1/2″ pieces of very vanilla cardstock scored at 4-1/4″
- Coordinating Cardstock for mats: I used early espresso 3-1/8″ x 3-1/8″; 1-1/8″ x 3-1/8″ (x3); 1-5/8″ x 1-5/8″ (x4) and 3-1/4″ x 3-1/4″ cut diagonally like the dsp
- Scraps of vanilla for greeting
- Scraps of coordinating cardstock for die cutting
- Ephemera or stamped images
- Coordinating twine
- Embellishments
Version One: Keep It Simple
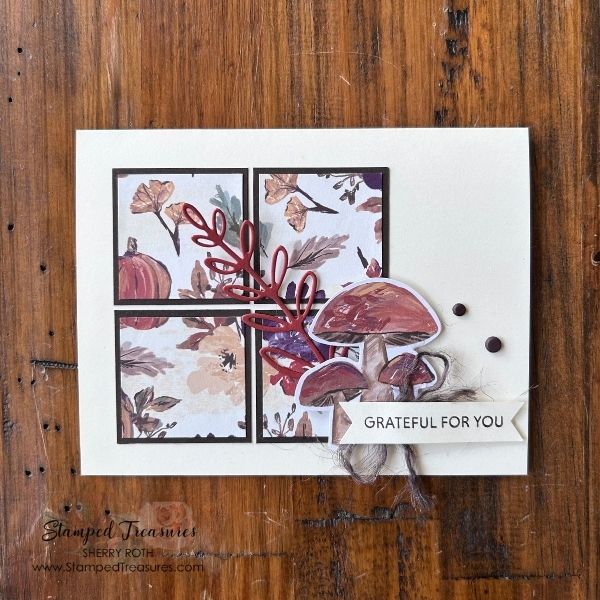
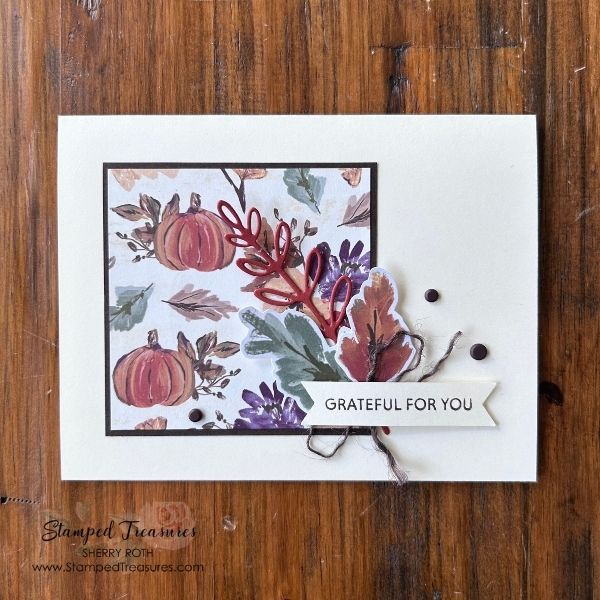
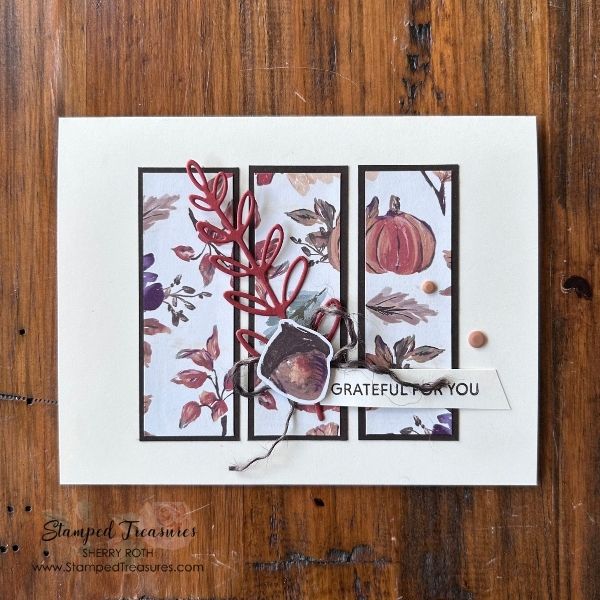
The first version is all about keeping things quick and easy. Once the pattern paper was cut, I added a few of the coordinating die-cut pieces, a greeting, some twine and a few embellishments. That’s it!
This is the version I reach for when I want to make several cards without spending a lot of time on each one. It’s also a great way to let your pattern paper do most of the work. The pretty pattern provides the colour and visual interest, while the coordinating ephemera gives you an easy way to finish the cards.
Adding in a bit of twine and some embellishments is an easy way to step up your projects without adding a ton of extra time.
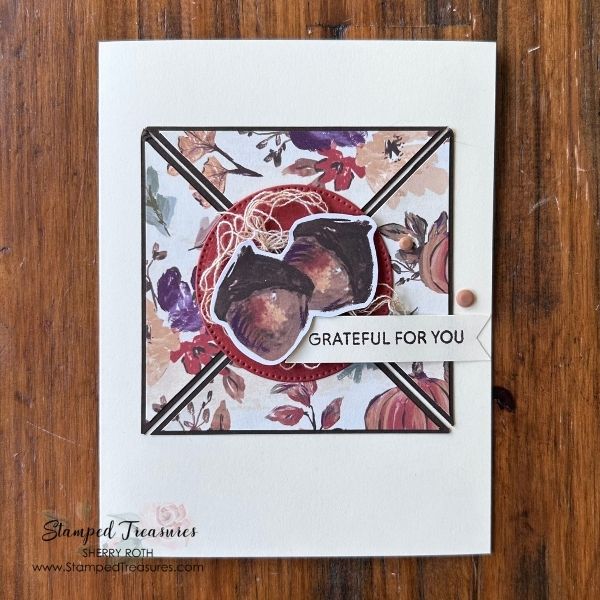
Version Two: Step It Up
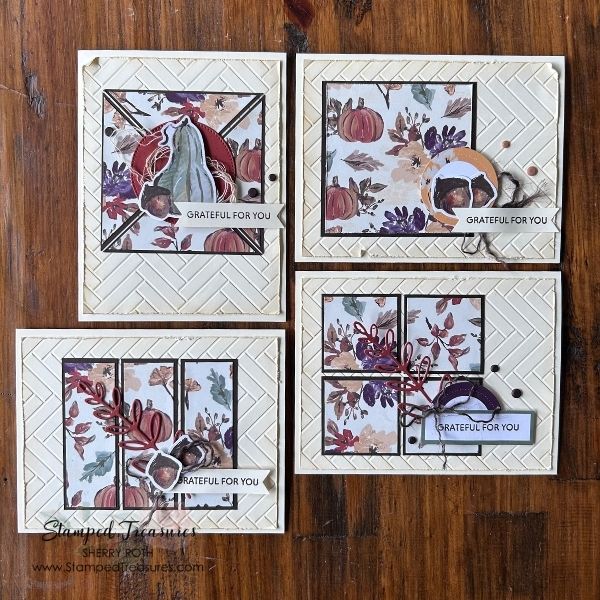
For the second version, I used the same basic one sheet wonder design but added a few more techniques to give the cards a little more depth and texture.
This time I incorporated:
- Embossing
- Ink blending
- Distressed edges
I particularly love what distressing the edges does. It gives the cards a more vintage, worn-in feel and works beautifully with the autumn colours and imagery. The ink blending adds another layer of colour and helps tie all of the elements together, while the embossing gives the cards some lovely texture.
Use What You Have
While I used the Autumn Opulence DSP for these cards, don’t feel like you need to have the same paper to try this one sheet wonder. In fact, I’d encourage you to look through your stash and see what you already have.
Try it with:
- A favourite 6″ x 6″ piece of pattern paper
- Scraps from another project
- A paper collection that needs to be used up
- Patterned paper you’ve been saving for “the perfect project”
- Coordinating cardstock and scraps from your stash
And when it comes to decorating, use what you have! Die cuts, punched pieces, stamped images, ribbon, twine, scraps, embellishments and even little bits of leftover ephemera can all be used to finish your cards. There really are no rules.
A Great Design for Christmas Cards
And don’t overlook one sheet wonders when you’re making your Christmas cards! This same design would work beautifully with your favourite Christmas pattern paper. If you’re making a lot of cards for the holidays, having a simple cutting formula that you can repeat makes the process much easier.
Watch the Video
If you’d like to see exactly how I cut the 6″ x 6″ pattern paper and put the cards together, be sure to watch the video. I’ll walk you through creating the cards, and share simple ways to step them up if you are looking for something a bit more involved. And because I couldn’t resist trying this design with Christmas paper, I’m also sharing a Christmas version in the video!
So grab a piece of 6″ x 6″ pattern paper from your stash and give it a try. You might be surprised by just how many possibilities you can get from one small piece of paper. One piece of paper. A few cuts. A little creativity. And several beautiful cards!
Until next time,

Shopping List
Click on any of these images to shop my Canadian online store or to find out more information about any of these products. In addition to these, I also used the Notes of Collage Dies and Timeless Herringbone embossing folder both of which will be available to customers in November. I also used some retired embellishments from my stash.
![Soiree Salutations Photopolymer Stamp Set (English) [ 168337 ]](https://assets1.tamsnetwork.com/images/EC042017NF/168337s.jpg "Soiree Salutations Photopolymer Stamp Set (English) [ 168337 ]")
![Stylish Shapes Dies [ 159183 ]](https://assets1.tamsnetwork.com/images/EC042017NF/159183s.jpg "Stylish Shapes Dies [ 159183 ]")
![Autumn Opulence 12" X 12" (30.5 X 30.5 Cm) Specialty Designer Series Paper [ 168336 ]](https://assets1.tamsnetwork.com/images/EC042017NF/168336s.jpg "Autumn Opulence 12\" X 12\" (30.5 X 30.5 Cm) Specialty Designer Series Paper [ 168336 ]")
![Neutrals Jute Combo Pack [ 168468 ]](https://assets1.tamsnetwork.com/images/EC042017NF/168468s.jpg "Neutrals Jute Combo Pack [ 168468 ]")
![Very Vanilla 8 1/2" X 11" Cardstock [ 166784 ]](https://assets1.tamsnetwork.com/images/EC042017NF/166784s.jpg "Very Vanilla 8 1/2\" X 11\" Cardstock [ 166784 ]")
![Early Espresso 8-1/2" X 11" Cardstock [ 119686 ]](https://assets1.tamsnetwork.com/images/EC042017NF/119686s.jpg "Early Espresso 8-1/2\" X 11\" Cardstock [ 119686 ]")
![Cajun Craze 8-1/2" X 11" Cardstock [ 119684 ]](https://assets1.tamsnetwork.com/images/EC042017NF/119684s.jpg "Cajun Craze 8-1/2\" X 11\" Cardstock [ 119684 ]")
![Multipurpose Liquid Glue [ 110755 ]](https://assets1.tamsnetwork.com/images/EC042017NF/110755s.jpg "Multipurpose Liquid Glue [ 110755 ]")
![Mini Stampin' Dimensionals [ 144108 ]](https://assets1.tamsnetwork.com/images/EC042017NF/144108s.jpg "Mini Stampin' Dimensionals [ 144108 ]")
![Mini Glue Dots [ 103683 ]](https://assets1.tamsnetwork.com/images/EC042017NF/103683s.jpg "Mini Glue Dots [ 103683 ]")
![Blending Brushes [ 153611 ]](https://assets1.tamsnetwork.com/images/EC042017NF/153611s.jpg "Blending Brushes [ 153611 ]")
![Pecan Pie Classic Stampin' Pad [ 161665 ]](https://assets1.tamsnetwork.com/images/EC042017NF/161665s.jpg "Pecan Pie Classic Stampin' Pad [ 161665 ]")
![Early Espresso Classic Stampin' Pad [ 147114 ]](https://assets1.tamsnetwork.com/images/EC042017NF/147114s.jpg "Early Espresso Classic Stampin' Pad [ 147114 ]")
![Paper Trimmer [ 152392 ]](https://assets1.tamsnetwork.com/images/EC042017NF/152392s.jpg "Paper Trimmer [ 152392 ]")
![Stampin' Cut & Emboss Machine [ 149653 ]](https://assets1.tamsnetwork.com/images/EC042017NF/149653s.jpg "Stampin' Cut & Emboss Machine [ 149653 ]")


Leave a Reply