When was the last time you reached for an embossing folder?
If you’re like many crafters, you probably have a wonderful collection tucked away in a drawer. Maybe you bought them because you loved the design, used them for a while, and then moved on to the next new product. For today’s Shop Your Stash challenge I’ll be sharing ideas on how to change that!
Embossing folders are one of the most versatile tools in any craft room. They don’t expire, they don’t go out of style, and they work beautifully across so many different types of projects—from cards and scrapbook layouts to journals, tags, mixed media, and home décor.
Today I’m sharing a few ideas to inspire you to pull those folders back out and give them a fresh look.
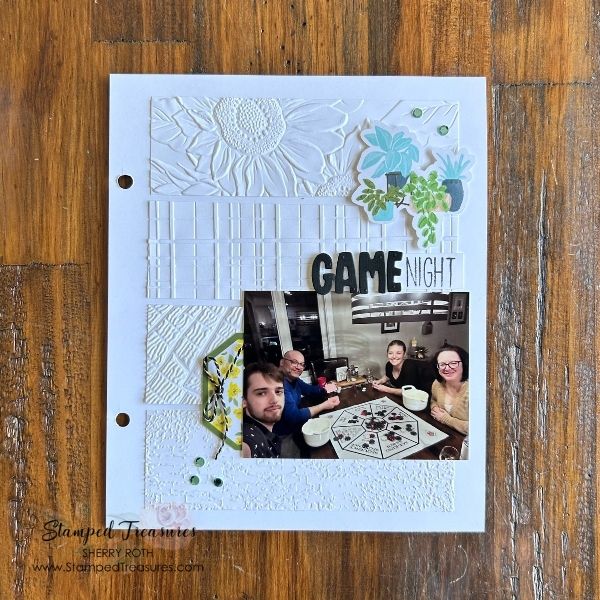
Add Texture to Your Scrapbook Layouts
Texture is one of the easiest ways to add interest to a scrapbook page without making it feel cluttered.
For the layout I’m sharing today, I combined several different embossing folders to create a layered background. Instead of using just one pattern throughout the page, I mixed complementary textures to give it a unique background. The result is a page with lots of visual interest while still allowing the photo to remain the focal point.
Don’t be afraid to mix geometric patterns with florals, woodgrain with botanicals, or subtle textures with more detailed designs. Just as you would layer patterned papers, you can layer embossed textures to create depth.
Some ideas to try:
- Emboss cardstock mats behind your photos.
- Create textured borders around your page.
- Emboss die-cut shapes before adding them to your layout.
- Lightly blend ink over the raised design to make the texture stand out even more.
- Emboss two-toned cardstock.
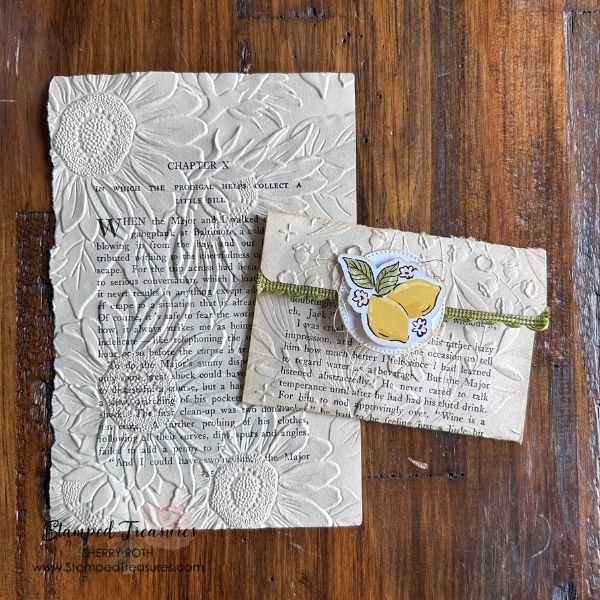
Think Beyond Cardstock
One of my favourite ways to shop my stash is to experiment with materials I already have on hand.
Embossing folders aren’t limited to cardstock—they can add beautiful texture to so many other surfaces.
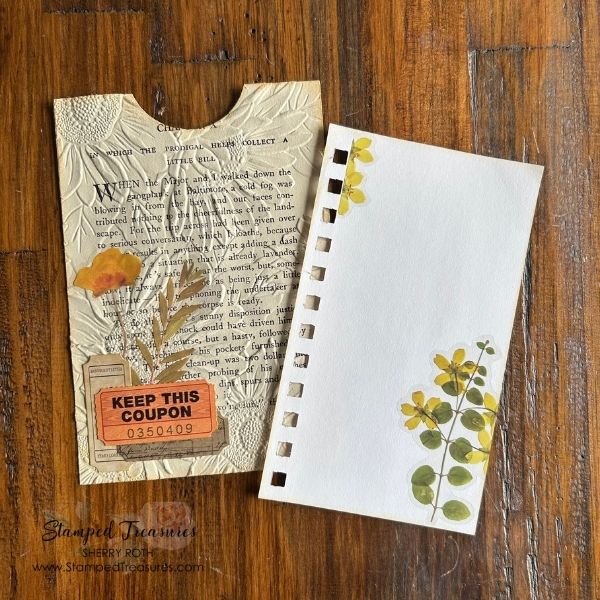
For this example, I embossed pages from vintage books, and I absolutely love the effect. The printed text shows through the raised design, creating instant vintage character that’s perfect for junk journals, altered books, collage projects, and mixed media art.
The thinner paper creates a softer impression than cardstock, but that’s exactly what makes it so interesting. Every page has its own personality.
You can also try embossing:
- Dictionary pages
- Sheet music
- Old maps
- Ledger paper
- Patterned paper
- Vellum
- Lightweight packaging
- Coffee-dyed papers
- Handmade papers
- Window Sheets
These embossed papers can become page backgrounds, pockets, tuck spots, tags, journal embellishments, or layered collage pieces.
Add Colour for Even More Impact
Once your paper is embossed, there are countless ways to enhance the design.
Try:
- Blending ink over the raised areas.
- Swiping an ink pad directly across the surface. See some examples of this here and here.
- Dry brushing acrylic paint over the texture.
- Lightly sanding two-tone coloured cardstock to reveal the white core.
A simple embossed background can quickly become a focal point with just a little extra colour.
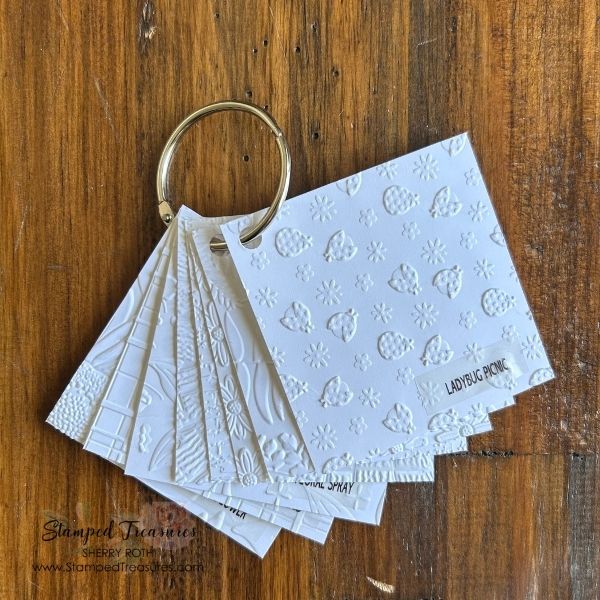
Create an Embossing Folder Reference Ring
Have you ever forgotten you owned a particular embossing folder? One of the best organizational ideas I’ve come across is creating an embossing folder reference ring. Simply cut a small sample of cardstock (I used 3×3) for each folder and emboss it using that design. Punch a hole in one corner and place all of the samples onto a book ring. Label each sample with the folder’s name so it’s easy to find later.
When you’re planning a project, you can simply flip through your ring instead of opening every storage container looking for the perfect pattern.
It’s a simple project that saves time, helps you rediscover forgotten favourites, and makes it much easier to coordinate textures with the rest of your supplies.
Challenge Yourself This Week
Choose one embossing folder you haven’t used in months—or maybe even years—and create something with it. Better yet, combine two or three different folders on the same project and see how they work together. You might be surprised at how fresh these well-loved tools can feel.
I’d love to see what you create! Share your projects in the comments below or tag me on social media so I can celebrate your creations with you.
Until next time,



Leave a Reply