Think Outside the Kit: Turning the Lakeside Retreat Paper Pumpkin Kit into a Scrapbook Layout
When you open a card kit, it’s easy to feel like there’s only one “right” way to use it. Follow the instructions. Make the cards. Done. But what if that kit could tell a bigger story? Today, I’m sharing a different way to approach your supplies by turning the Lakeside Retreat Paper Pumpkin Kit into a scrapbook layout—so you can use those beautiful designs to document memories, not just send them.
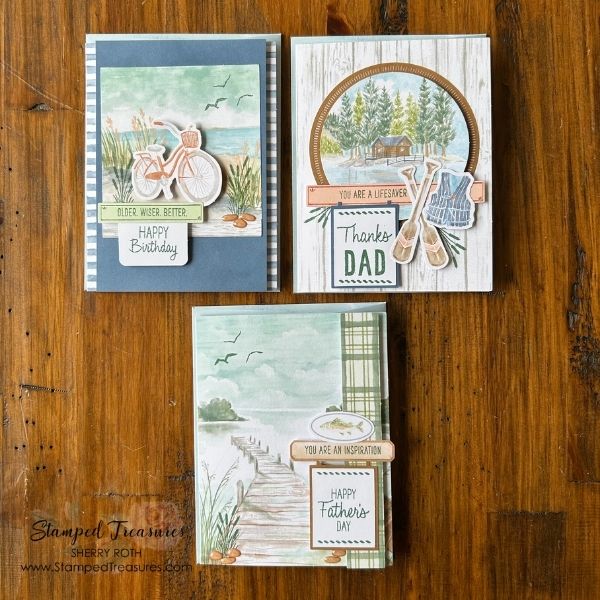
These are the cards that are meant to be created with the kit.
It’s Not Just a Card Kit—It’s a Story Starter
Card kits are designed to be cohesive. Everything matches, everything coordinates, and everything is ready to go. That’s exactly what makes them so powerful for scrapbooking. Instead of thinking of the kit as a finished project, think of it as a collection of story pieces. Something you can turn into backgrounds, use as layers, frames or embellishments. All working together to highlight your photos.
Watch the Layout Come Together
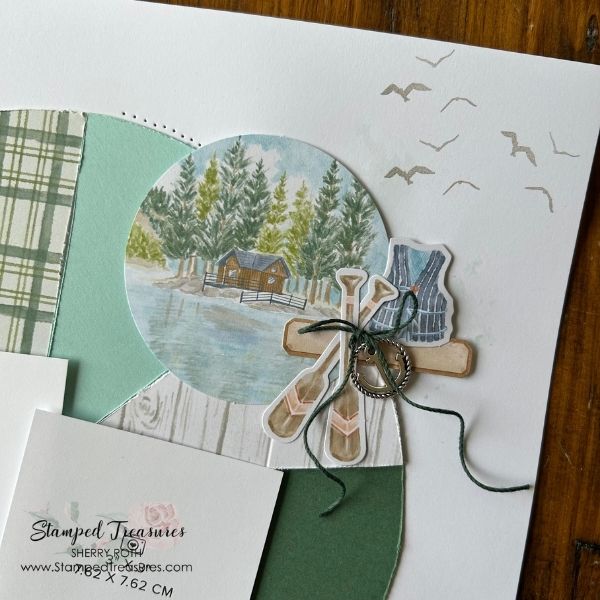
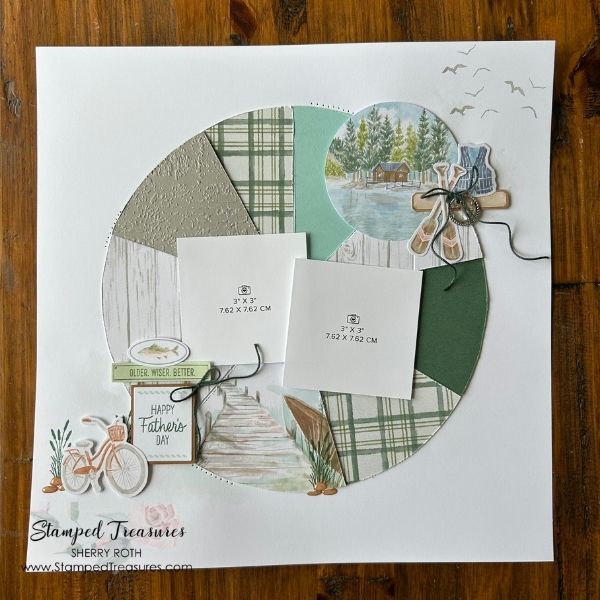
In the video below, I walk you through how I took individual card elements and reimagined them into a layout that would be perfect for documenting Father’s Day photos or a day at the lake.
A Different Way to Approach Your Layout
Rather than following steps, try this mindset shift when working with a card kit:
- Start with the Feeling. The Lakeside Retreat kit has a calm, nature-inspired vibe. Lean into that feeling—think about quiet moments, outdoor memories, and simple stories.
- Let the Kit Guide Your Design. Instead of cutting everything apart right away, look at the card designs as ready-made layout sections. Many of them already function like layered scrapbook elements. But if that doesn’t work, don’t be afraid to cut them apart like I did.
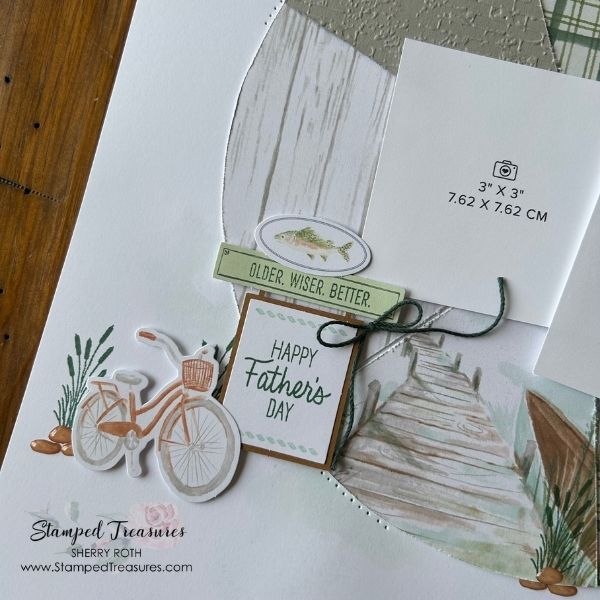
- Build Around Your Photos. If you don’t have the photos yet, decide on the quantity and sizes and use photo place holders so that you can continue to create your layout. Use the kit pieces to frame and enhance your story, not overwhelm it.
- Embrace Imperfection. You don’t have to use every piece “as intended.” Rotate elements, trim them down, or layer them in unexpected ways. This is where creativity really starts to take over.
Why This Approach Feels Different
This isn’t about using up supplies. It’s about slowing down and telling a story. Letting your products inspire your design. And creating something more meaningful than the original project. You’re not just making something—you’re reimagining it.
Ready to See It in Action?
Make sure to watch the full video above to see exactly how this layout came together using the Lakeside Retreat Paper Pumpkin Kit.
Happy creating!
Until next time,

Supply List
In addition to the Lakeside Retreat Paper Pumpkin kit, I also used a paper plate, some retired twine and the following supplies:
![Exposed Brick 3 D Embossing Folder [ 161600 ]](https://assets1.tamsnetwork.com/images/EC042017NF/161600s.jpg "Exposed Brick 3 D Embossing Folder [ 161600 ]")
![White Willow 12" X 12" (30.5 X 30.5 Cm) Cardstock [ 166703 ]](https://assets1.tamsnetwork.com/images/EC042017NF/166703s.jpg "White Willow 12\" X 12\" (30.5 X 30.5 Cm) Cardstock [ 166703 ]")
![Gray Granite 8-1/2" X 11" Cardstock [ 146983 ]](https://assets1.tamsnetwork.com/images/EC042017NF/146983s.jpg "Gray Granite 8-1/2\" X 11\" Cardstock [ 146983 ]")
![Pool Party 8-1/2" X 11" Cardstock [ 122924 ]](https://assets1.tamsnetwork.com/images/EC042017NF/122924s.jpg "Pool Party 8-1/2\" X 11\" Cardstock [ 122924 ]")
![Pool Party Classic Stampin' Pad [ 147107 ]](https://assets1.tamsnetwork.com/images/EC042017NF/147107s.jpg "Pool Party Classic Stampin' Pad [ 147107 ]")
![Gray Granite Classic Stampin' Pad [ 147118 ]](https://assets1.tamsnetwork.com/images/EC042017NF/147118s.jpg "Gray Granite Classic Stampin' Pad [ 147118 ]")
![Stampin' Cut & Emboss Machine [ 149653 ]](https://assets1.tamsnetwork.com/images/EC042017NF/149653s.jpg "Stampin' Cut & Emboss Machine [ 149653 ]")


Leave a Reply