
If you’re anything like me, you have a beautiful (and ever-growing!) collection of scraps, leftover die cuts, bits of ribbon, and those “too pretty to throw away” pieces. As a Stampin’ Up! demonstrator who truly believes in using what I have, I’m always looking for ways to make my supplies go further—and clusters are one of my absolute favourite solutions.
They’re creative, versatile, and best of all… they turn “leftovers” into something truly special.
Watch this video for tips & tricks on creating clusters.
What Are Clusters?
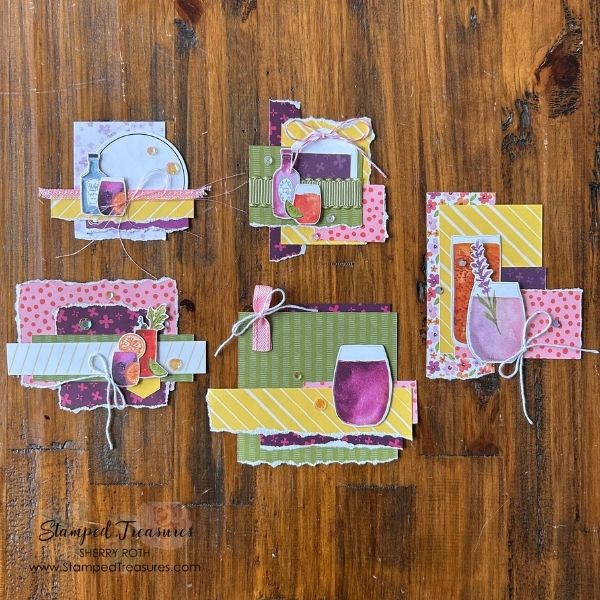
Clusters are small groupings of layered elements—paper, embellishments, textures—that are arranged together to create a focal point or decorative accent.
Think of them as mini collages you can create ahead of time and use later.
They can include:
- Scraps of Designer Series Paper
- Die cuts (leftover or intentionally cut)
- Stamped images
- Ribbon, twine, lace
- Tags, labels, tickets
- Ephemera or punched shapes
The beauty? There are no rules. Just layers, texture, and creativity.
Why Clusters Are a Game-Changer
- They Reduce Waste – Instead of tossing those oddly shaped scraps, you’re giving them a second life.
- They Save Time – Create a batch of clusters in one sitting, and you’ll have ready-to-go embellishments for future projects.
- They Stretch Your Supplies – That paper pack you love? It suddenly goes so much further when even the tiniest pieces get used.
- They Spark Creativity – Sometimes it’s easier to start with a finished cluster and build your project around it.
How to Create Clusters (My Simple Process)
You don’t need a plan—just start pulling things together.
- Start with a Base. Choose a larger scrap as your foundation like a torn piece of DSP, a tag or label or a book page or card stock scrap
- Add Layers. Build interest by layering. Mix patterns + solids. Combine straight edges with torn edges. Vary sizes and shapes.
- Create Texture. This is where clusters come to life: add ribbon, twine, or fabric; include embossed pieces or vellum; add dimension using dimensionals.
- Add a Focal Point. Every cluster needs something to anchor it. Add a stamped, a sentiment or die cut shape.
- Finish with Details. The little things make a big impact. Include embossed pieces, vellum, enamel dots, sequins, ink splatters or stitching.
How to Use Your Clusters
Now that your clusters are made, how do you use them?
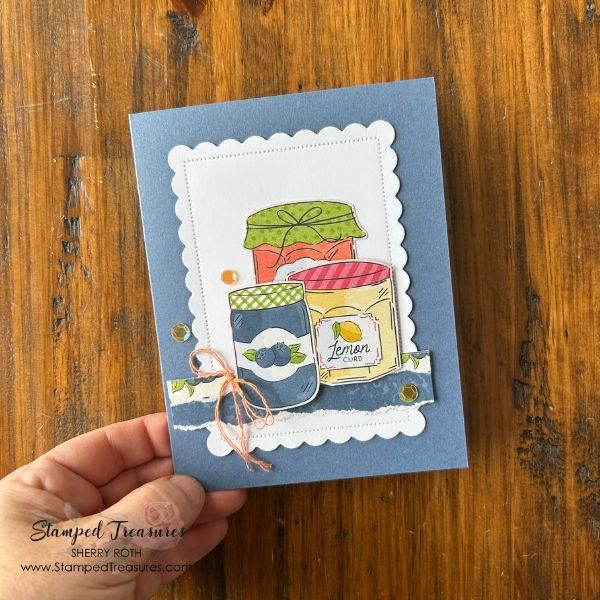
- Cards: use a cluster as your focal point on a card front. Add a sentiment and you’re done—quick, easy, and beautiful.
- Scrapbook Layouts: clusters make perfect embellishment groupings. Use them to frame photos or fill visual triangles on your page.
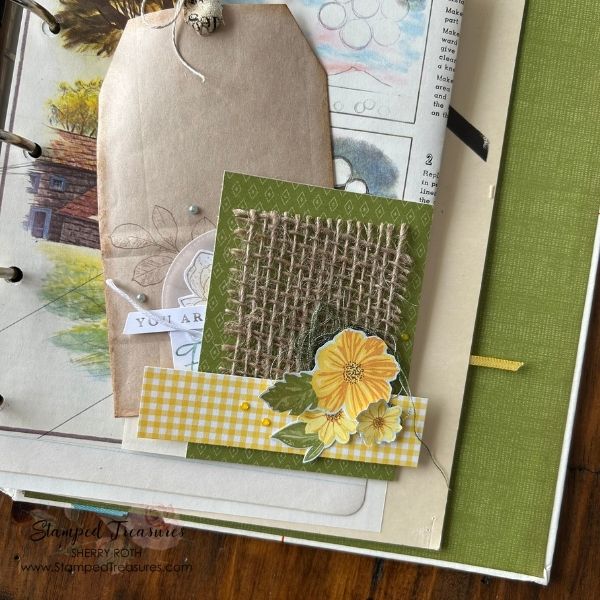
- Albums & Junk Journals: tuck them into pockets, attach them to pages, or use them as interactive elements like flip-ups or tags.
- Tags & Packaging: turn a cluster into a gift tag or add it to packaging for a handmade touch.

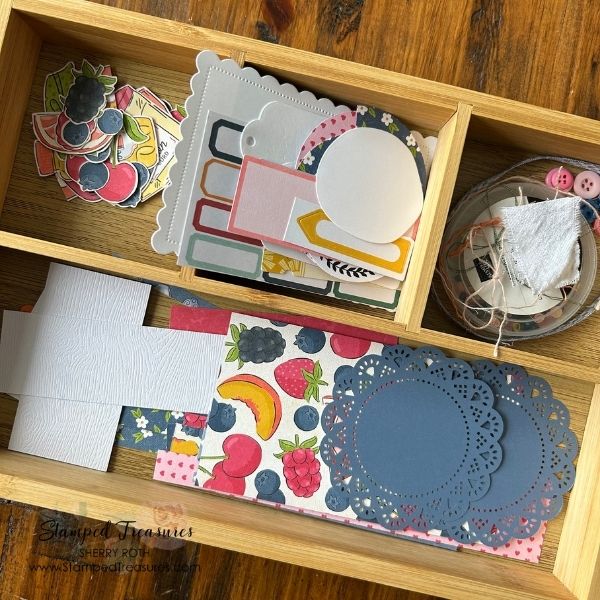
My Favourite Tip: Make a “Cluster Session”
Instead of making them as you go, set aside time to:
- Pull out your scrap bin
- Grab your embellishment stash
- Create 10–20 clusters in one sitting
Store them in a small container or envelope, and you’ll always have something ready when inspiration hits.
Let Nothing Go to Waste
There’s something really satisfying about using every last bit of your supplies. Not only does it make your investment go further, but it also challenges you creatively in the best way.
Those tiny scraps? They’re not leftovers. They’re possibilities.
So next time you finish a project, don’t clean up too quickly—start a cluster instead.
You might just create your next favourite embellishment.

Supply List
Click on any of the images to shop my Canadian online store or to find out more information about any of these products. In addition to these supplies, I also dug into my stash. Several of the products are old and I don’t have links for anymore.
![Banner Sayings Bundle (English) [ 167051 ]](https://assets1.tamsnetwork.com/images/EC042017NF/167051s.jpg "Banner Sayings Bundle (English) [ 167051 ]")
![Homemade Sweetness 12" X 12" (30.5 X 30.5 Cm) Designer Series Paper [ 167467 ]](https://assets1.tamsnetwork.com/images/EC042017NF/167467s.jpg "Homemade Sweetness 12\" X 12\" (30.5 X 30.5 Cm) Designer Series Paper [ 167467 ]")
![Misty Moonlight 1/4" (6.4 Mm) Checkered Trim [ 167480 ]](https://assets1.tamsnetwork.com/images/EC042017NF/167480s.jpg "Misty Moonlight 1/4\" (6.4 Mm) Checkered Trim [ 167480 ]")
![Baker's Twine Essentials Pack [ 155475 ]](https://assets1.tamsnetwork.com/images/EC042017NF/155475s.jpg "Baker's Twine Essentials Pack [ 155475 ]")
![Strawberries & Dots [ 167479 ]](https://assets1.tamsnetwork.com/images/EC042017NF/167479s.jpg "Strawberries & Dots [ 167479 ]")
![Basic White Assorted Memories & More Cards & Envelopes [ 159234 ]](https://assets1.tamsnetwork.com/images/EC042017NF/159234s.jpg "Basic White Assorted Memories & More Cards & Envelopes [ 159234 ]")
![Basic White 8 1/2" X 11" Cardstock [ 166780 ]](https://assets1.tamsnetwork.com/images/EC042017NF/166780s.jpg "Basic White 8 1/2\" X 11\" Cardstock [ 166780 ]")
![Basic White 8 1/2" X 11" Thick Cardstock [ 159229 ]](https://assets1.tamsnetwork.com/images/EC042017NF/159229s.jpg "Basic White 8 1/2\" X 11\" Thick Cardstock [ 159229 ]")
![Misty Moonlight 8-1/2" X 11" Cardstock [ 153081 ]](https://assets1.tamsnetwork.com/images/EC042017NF/153081s.jpg "Misty Moonlight 8-1/2\" X 11\" Cardstock [ 153081 ]")
![Blending Brushes [ 153611 ]](https://assets1.tamsnetwork.com/images/EC042017NF/153611s.jpg "Blending Brushes [ 153611 ]")
![2" (5.1 Cm) Circle Punch [ 133782 ]](https://assets1.tamsnetwork.com/images/EC042017NF/133782s.jpg "2\" (5.1 Cm) Circle Punch [ 133782 ]")
![2 3/8" (6 Cm) Circle Punch [ 161354 ]](https://assets1.tamsnetwork.com/images/EC042017NF/161354s.jpg "2 3/8\" (6 Cm) Circle Punch [ 161354 ]")
![Pecan Pie Classic Stampin' Pad [ 161665 ]](https://assets1.tamsnetwork.com/images/EC042017NF/161665s.jpg "Pecan Pie Classic Stampin' Pad [ 161665 ]")
![Tuxedo Black Memento Ink Pad [ 132708 ]](https://assets1.tamsnetwork.com/images/EC042017NF/132708s.jpg "Tuxedo Black Memento Ink Pad [ 132708 ]")


Leave a Reply