
Today I’m sharing 7 no stamping card ideas using Stampin’ Up!’s Mixed Media Florals Memories & More cards. Their memories & more cards can make for really quick & easy cards but I wanted to step them up a bit. So along the way I share simple ways to add a little something to a simple card.
Tip
Having cards & envelopes pre cut and ready to go saves time. Whenever I make cards using our memories & more cards, I always pull out a package of our assorted memories & more cards & envelopes. It includes ten 4-1/4″ x 6-1/4″ cards & envelopes and ten 3-1/4″ x 4-1/4″ cards & envelopes. It saves me having to cut and score them. These and a package of note cards & envelopes are must haves in my craft stash. You can find a full supply list below.
I filmed a video walking you through making the 7 cards here:
Retiring Products
Some of the products I’ve used in this post are soon to retire. They’ve been added to the last chance list and are only available while supplies last.
- Mixed Media Florals Memories & More Cards
- Dots for Days
- Distressed Tile Embossing Folder
Let’s take a closer look at the cards…

A simple way to step up these cards is to cut out a portion of the card and pop it up. For this card I cut out the grateful banner. After sticking the card to a layer of black card stock, I added the banner with dimensionals. This gives the card a bit of dimension.
Adding gems and twine, or ribbon is also another simple way to step up your projects.
Here’s what I used for this card:
- 4-1/4″ x 6-1/4″ card & envelope
- 4″ x 6″ Mixed Media Floral card trimmed down to 3-7/8″ x 5-7/8″ – cut out the grateful banner
- Basic Black: 4″ x 6″
- White Twine: 8″
- Pink Dots for Days: x3

The Mixed Media Florals Memories & More cards come with 2 sheets of stickers. Popping up the stickers, rather than putting them on flat is another great way to step up a project. And of course, I added a bit of twine for texture.
Supplies:
- 3-1/4″ x 4-1/4″ card & envelope
- 3″ x 4″ Mixed Media Florals card with lady bugs and You’re Amazing Sticker
- White Twine: 12″

Layering cards is a great way to add a variety of patterns to your cards and for added texture, you can use your scissors to distress around the edges.
Supplies:
- 4-1/4″ x 6-1/4″ card & envelope
- 3″ x 4″ Mixed Media Florals Cards – black/white floral and black/white dash pattern with flowers in the centre; Just a Note Sticker
- White Twine: 8″
- Yellow Dots for Days: x3

I repeated the same idea for card #4 but added in a die cut rectangle so that the narrow greeting wouldn’t get lost in the pattern under it. Adding in some die cut, or punched, shapes is another simple way to step up your cards.
Measurements:
- 4-1/4″ x 6-1/4″ card & envelope
- 3″ x 4″ Mixed Media Florals Cards – pink/white stripe and pink/green floral; heartfelt thanks sticker
- Basic White: die cut 2nd smallest rectangle from the Textured Notes dies
- White Twine: 8″
- Green Dots for Days: x2
Card 5

For card #5 I layered a 4″ x 6″ and a 3″ x 4″ card. To break up the business of the floral card, I added scraps of white & black card stock. Then added a couple of the stickers and a few of the pink dots.
I always end up with leftover 3-1/4″ x 4-1/4″ cards & envelopes from the assorted package. Here in Canada, these are too small to mail so they have to be hand delivered. They are great to add to a gift package or to include a gift card though. Knowing this I’m ok cutting up the smaller cards to use as layers. That’s what I did for the white layer behind the floral card.
Supplies:
- 4-1/4″ x 6-1/4″ card & envelope
- 3-1/4″ x 6-1/4″ card – cut off the card front and use as mat for the floral card; save the other half – we’ll use on another card
- Mixed Media Florals cards – 4×6 pink/white stripe; 3″ x 4″ blue floral card; blue circle sticker (cut in half); 2 of the oval floral stickers
- Basic White: 3/4″ x 3-3/4″
- Basic Black: 1/2″ x 3-3/4″
- White Twine: 8″
- Pink Dots: x6
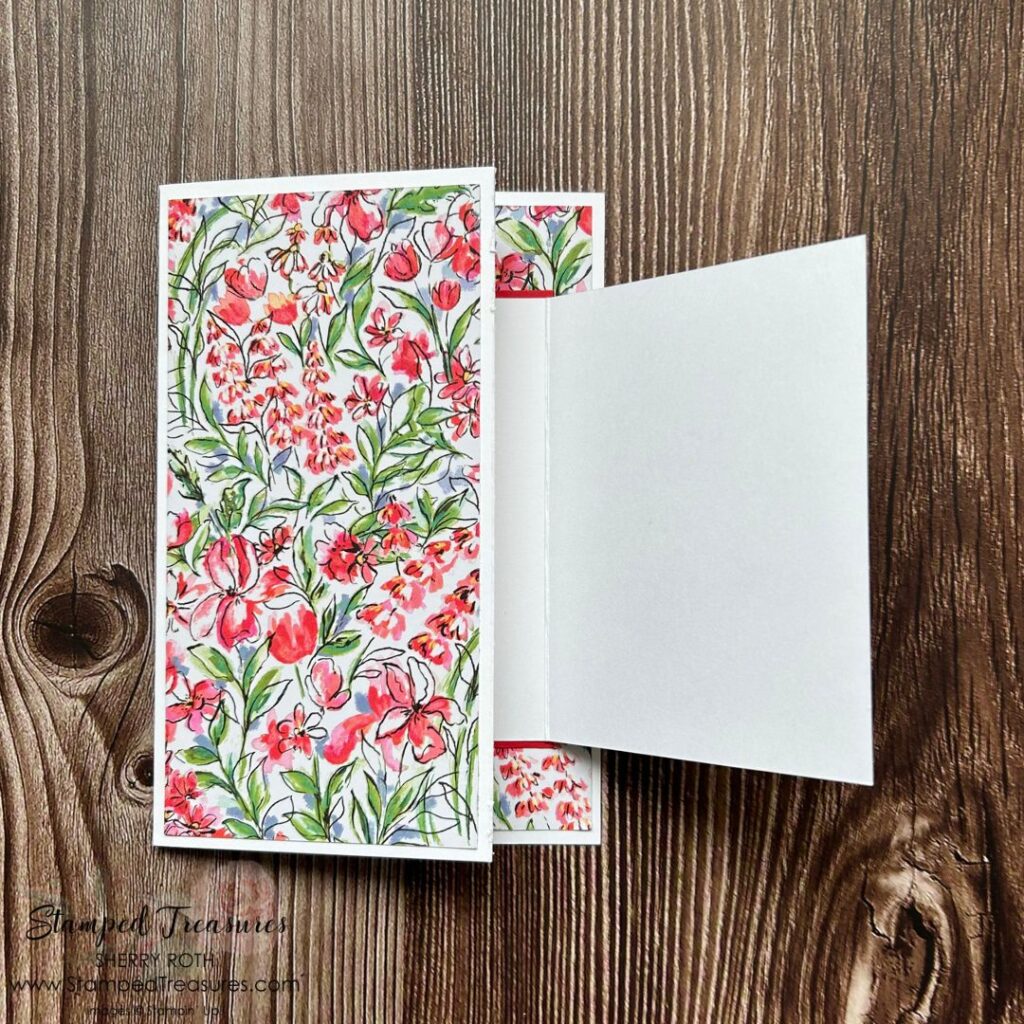
A Fun Fold Card

For the final two cards we are going to step it up a bit. Card 6 has a little bit of a fun fold and uses both a 4-1/4″ x 6-1/4″ and a 3-1/4″ x 4-1/4″ card base.
To create this card, you’ll cut 1″ off the larger card base and cut the 4×6 floral card down to 3″ x 6″ so that you have two pieces one that measures 1″ x 6″ and the other 3″ x 6″.
Supplies:
- 4-1/4″ x 6-1/4″ card & envelope and 3-1/4″ x 4-1/4″ card base
- Mixed Media Florals Cards: 4″ x 6″ floral cut down to 1″ x 6″ and 3″ x 6″; tulip sticker and celebrate
- Leftover white piece from the card base – emboss using the distressed tile embossing folder
- Poppy Parade: 3-3/8″ x 4-3/8″
- White Twine: 18″
- Green Dots: x2
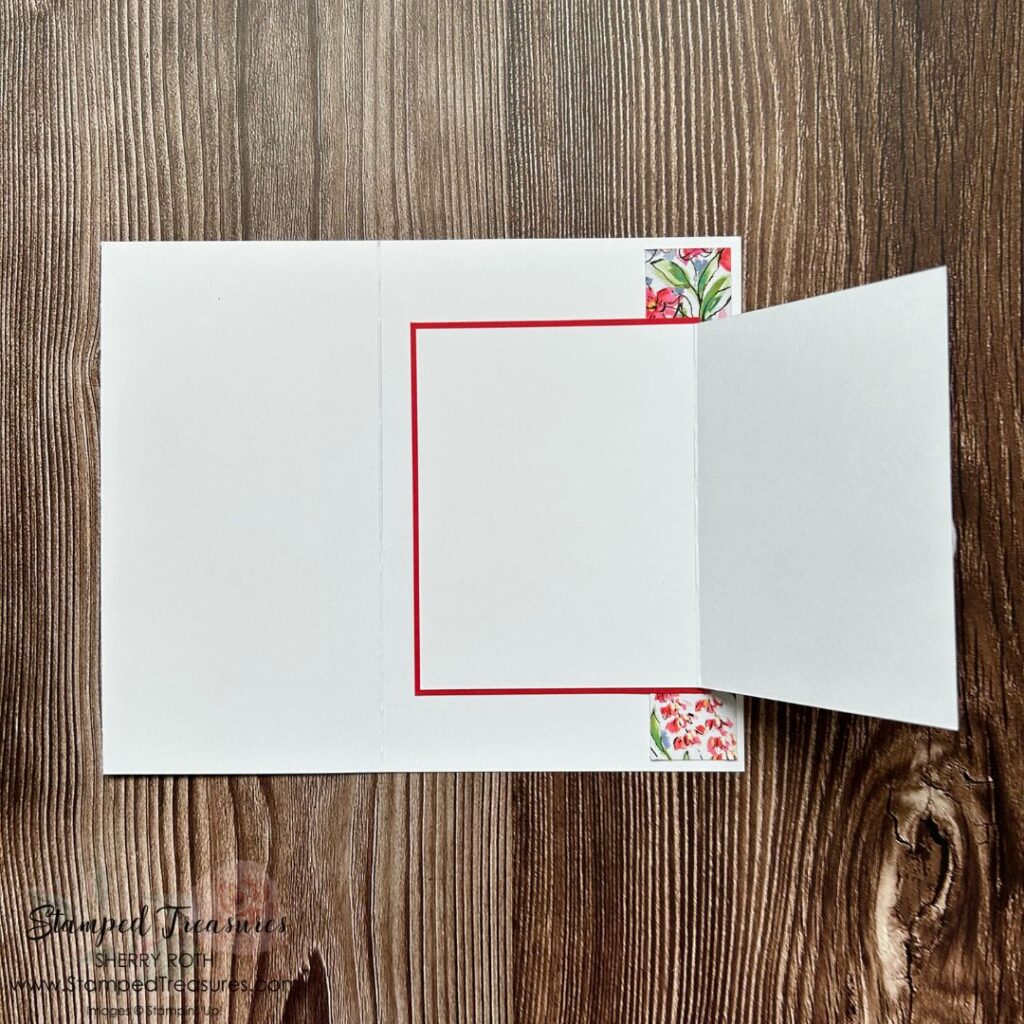
Here’s a look at the card all the way open.
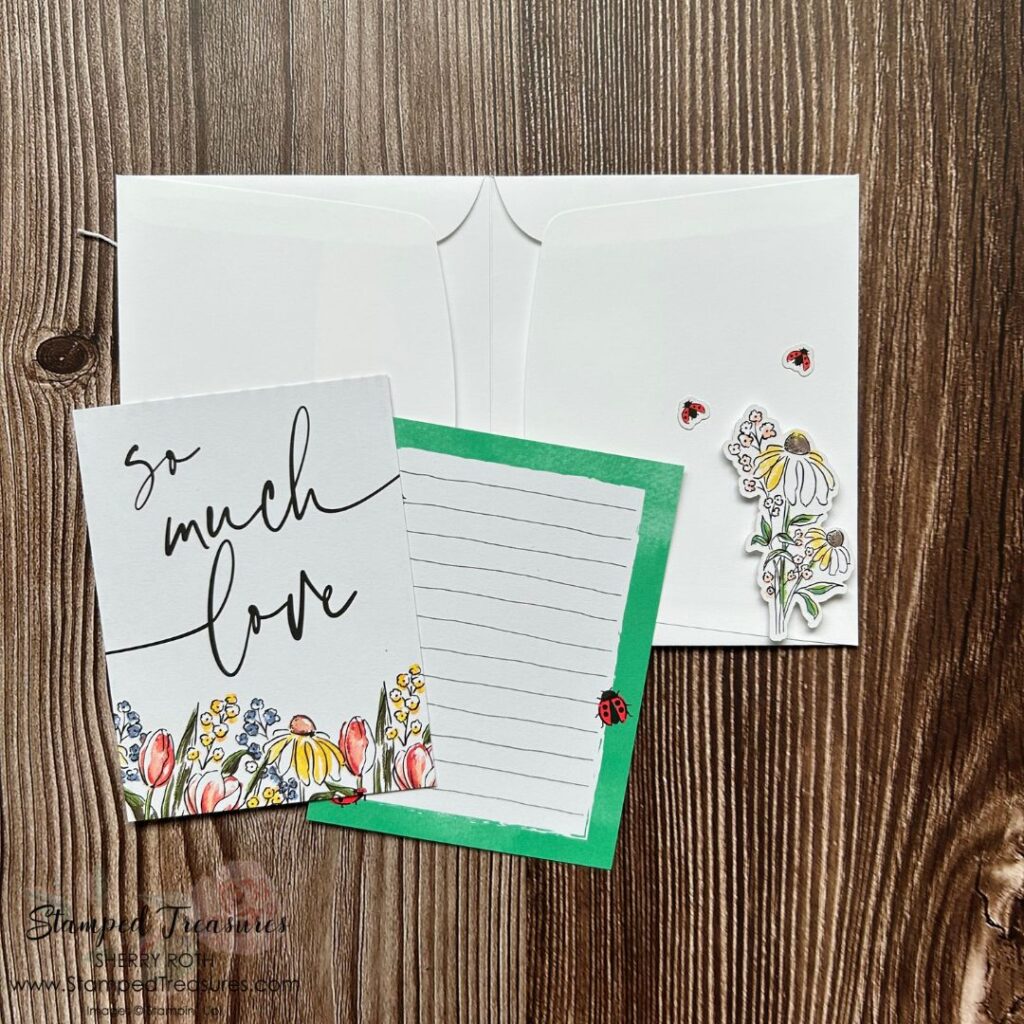
Gift Card Holder

This last card is a gift card holder and uses two of the smaller envelopes as a base. See the video, linked above, to find out how to assemble it.
Supplies:
- Two of the smaller envelopes
- Mixed Media Florals Cards: 3 of the 3″ x 4″ cards – one for the front, one journaling card to write a message inside and the other with a greeting; Happy Birthday sticker; daisy sticker and two lady bug stickers
- Basic Black: 3-1/8″ x 4-1/8″
- White Twine: 8″
Here’s a look at the inside and the other two cards I used.
I hope you enjoyed these no stamping cards!
Until next time,

Shopping List
Click on any of the images to shop my Canadian online store or to find out more information about any of these products.
![Mixed Media Florals Memories & More Card Pack [ 164657 ]](https://assets1.tamsnetwork.com/images/EC042017NF/164657s.jpg "Mixed Media Florals Memories & More Card Pack [ 164657 ]")
![Assorted Memories & More Cards & Envelopes [ 149710 ]](https://assets1.tamsnetwork.com/images/EC042017NF/149710s.jpg "Assorted Memories & More Cards & Envelopes [ 149710 ]")
![Textured Notes Dies [ 165555 ]](https://assets1.tamsnetwork.com/images/EC042017NF/165555s.jpg "Textured Notes Dies [ 165555 ]")
![Distressed Tile 3 D Embossing Folder [ 162189 ]](https://assets1.tamsnetwork.com/images/EC042017NF/162189s.jpg "Distressed Tile 3 D Embossing Folder [ 162189 ]")
![Adhesive Backed Dots For Days [ 163779 ]](https://assets1.tamsnetwork.com/images/EC042017NF/163779s.jpg "Adhesive Backed Dots For Days [ 163779 ]")
![Baker's Twine Essentials Pack [ 155475 ]](https://assets1.tamsnetwork.com/images/EC042017NF/155475s.jpg "Baker's Twine Essentials Pack [ 155475 ]")
![Basic Black 8-1/2" X 11" Cardstock [ 121045 ]](https://assets1.tamsnetwork.com/images/EC042017NF/121045s.jpg "Basic Black 8-1/2\" X 11\" Cardstock [ 121045 ]")
![Basic White 8 1/2" X 11" Cardstock [ 166780 ]](https://assets1.tamsnetwork.com/images/EC042017NF/166780s.jpg "Basic White 8 1/2\" X 11\" Cardstock [ 166780 ]")
![Poppy Parade 8-1/2" X 11" Cardstock [ 119793 ]](https://assets1.tamsnetwork.com/images/EC042017NF/119793s.jpg "Poppy Parade 8-1/2\" X 11\" Cardstock [ 119793 ]")
![Multipurpose Liquid Glue [ 110755 ]](https://assets1.tamsnetwork.com/images/EC042017NF/110755s.jpg "Multipurpose Liquid Glue [ 110755 ]")
![Stampin' Cut & Emboss Machine [ 149653 ]](https://assets1.tamsnetwork.com/images/EC042017NF/149653s.jpg "Stampin' Cut & Emboss Machine [ 149653 ]")


Leave a Reply