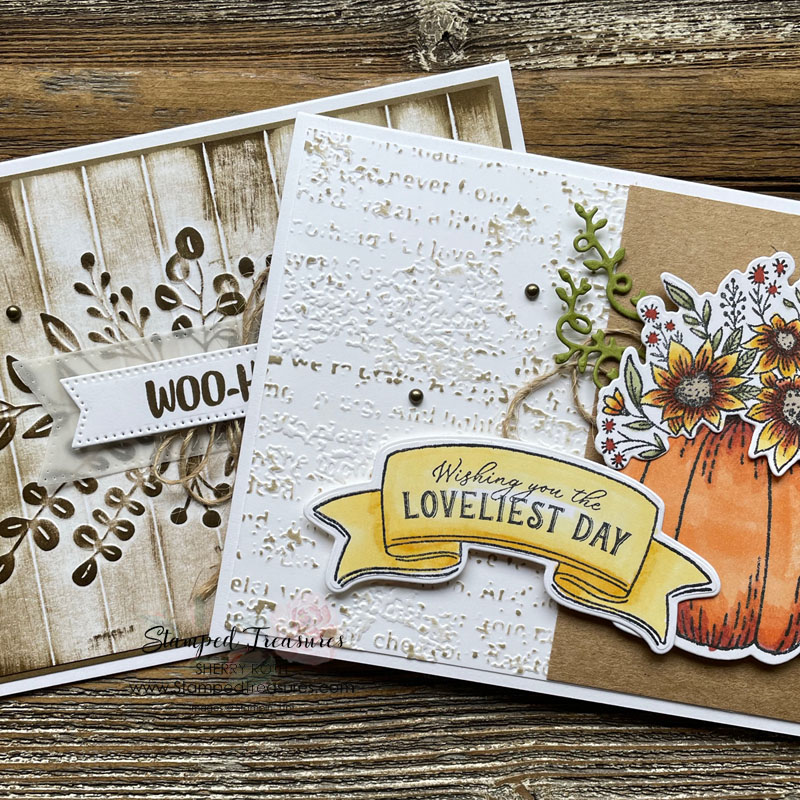
In todays post I’m sharing 2 simple embossing folder techniques. This is week 2 of my month long focus on embossing folders and what you can do with them. If you missed last weeks post you can find it here.
The first and second card that I’m sharing both feature the same technique. Simply emboss a piece of card stock and then lightly swipe an ink pad across the raised portion. This gives the embossed image more emphasis and really makes it stand out.
This was the birthday card I made for my son. I combined the Timeworn Type embossing folder with the Tree Rings Hybrid bundle and the Nuts About Squirrels stamp set. It turned out to be such a cute card!
This Wishing you the Loveliest Day card combines the Timeworn Type embossing folder with the Hello Harvest bundle.
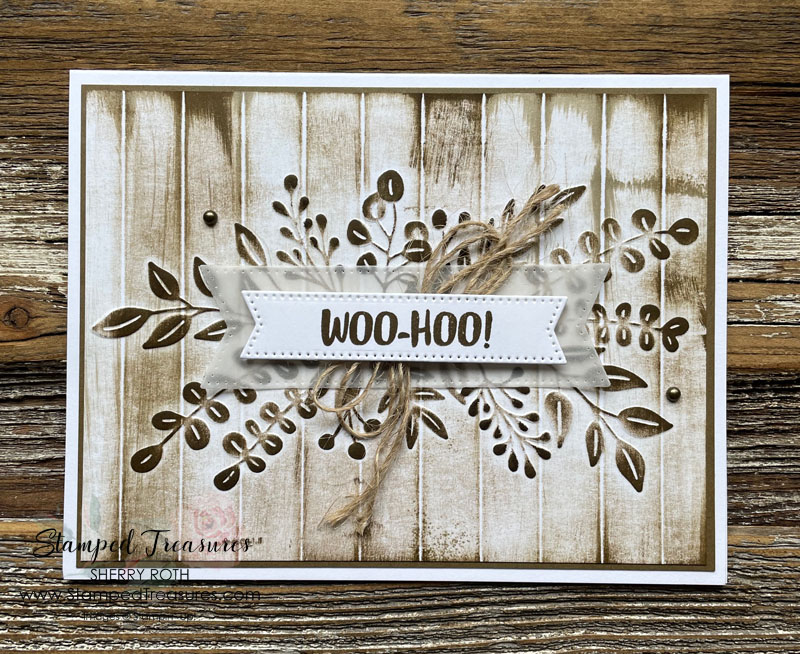
This second card gives the look of a wood burned image and it’s so easy to do!
Instructions:
- Use your simply scored board (or paper trimmer with scoring tool) to score every 1/2″ across a 3-7/8″ x 5-1/8″ piece of white card stock.
- Gently swipe your Sahara Sand ink pad down the scored card stock.
- Add the inked card stock to your Elegant Eucalyptus embossing folder with the SU! logo face up. Run it through your die cutting machine.
- Remove it from the folder and gently swipe your soft suede ink pad across the raised image. This gives you the look of burnt wood!
- To finish off the card I stamped a greeting from the charming sentiments stamp set onto a white banner cut from the Stylish Shapes dies and added that to a larger banner cut from vellum.
- The twine is pieces pulled from the silver threaded twine.
This is such a fun and simple technique to try! Here’s a video showing you just how easy it is to do.
Until next time,

Shopping List
Click on any of the images to shop my Canadian online store or to find out more about any of these products.


Leave a Reply