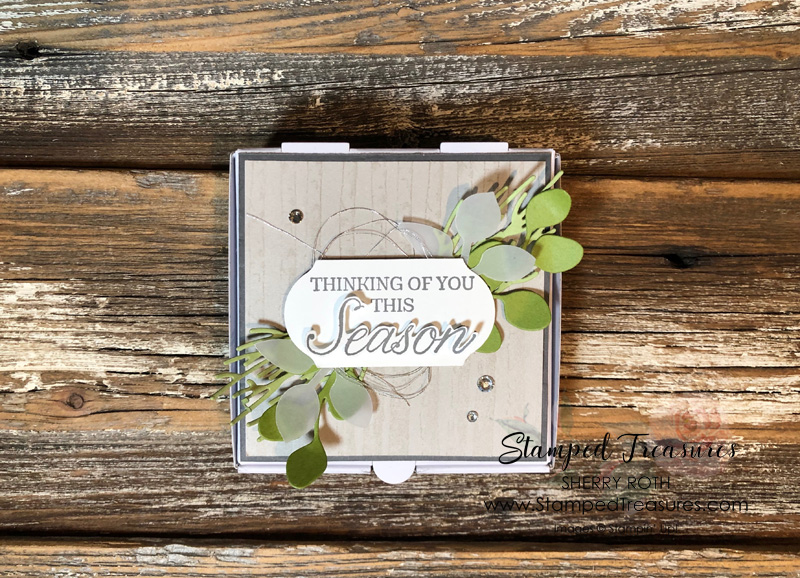
I’ve got a step-by-step tutorial for this adorable Winter Woods mini pizza box for your today. This would make great packaging for a small gift or even a gift card.
You’ll find a full supply list at the bottom of this post.
Measurement:
- Basic Gray: 3 3/8” x 3 3/8”
- Sahara Sand: 3 ¼” x 3 ¼”
- Whisper White: Scrap for greeting
- Vellum: leaf punch (x2)
- Pear Pizzazz: branch die from In the Woods (x2)
- Old Olive: leaf die from In the Woods (x2)
- Silver Thread: about 36”
Instructions:
- Assemble pizza box.
- Stamp the birch background, all across the sahara sand cardstock using the same colour ink.
- Add that to the center of the basic gray cardstock and that to the top of the pizza box.
- Stamp the greeting using basic gray ink onto the scrap of white cardstock and punch it out using the timeless label punch.
- Stamp the greeting again on white and cut out the word ‘season’.
- Using dimensionals add the fussy cut word over top of the punched greeting.
- Add adhesive behind the greeting. Wrap the thread around your fingers and add it to the back of the greeting. Mess it up a bit so it’s not perfectly round.
- Using mini glue dots layer the olive leaf onto one of the branched and then the vellum leaf on top of that. Add that to the back of thee greeting.
- Repeat this with the other shapes and add to the opposite corner of the greeting.
- Add that to the top of the pizza box. I used dimensionals under the greeting and mini glue dots under the leaves because of the different layers.
- Add three rhinestones.
Have a creative day!
Place a minimum $60 order, online, using host code JQBKGPDV,
between January 30th, 2025 and February 28th, 2025
and I'll send you a tutorial full of 16 project ideas to inspire your next crafty session.

Winter Woods Mini Pizza Box Supply List
Additional supplies: die cutting machine
Click on any of the images to find out more or to shop online.


Leave a Reply