
Today I’m sharing tips on how to use products from your stash to make three fun cards. The three original cards were created using Stampin’ Up!’s® Poppin’ By bundle but I’ll share how you can use the same card designs with completely different product.
I think sometimes we get hung up on using the same products as the project that inspired us. But you can create something just as beautiful, if not even more so using products from you stash.
I walk you through creating three cards, the alternates and things to look for in your stash to recreate these ideas in the video below.
Let’s take a closer look at the cards.
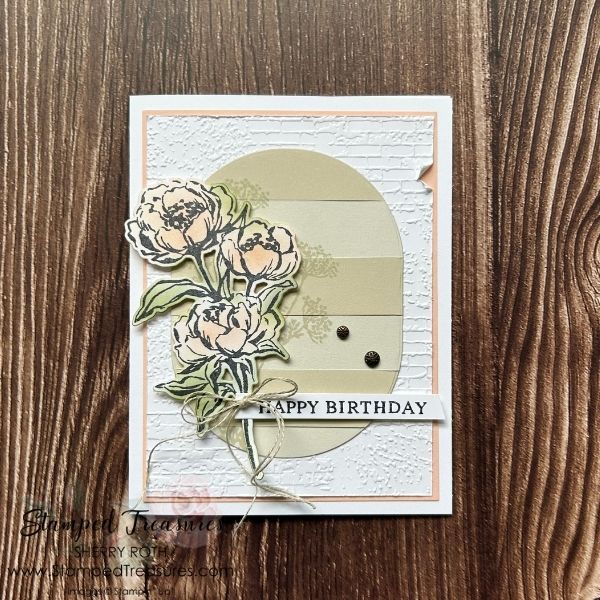
Card 1
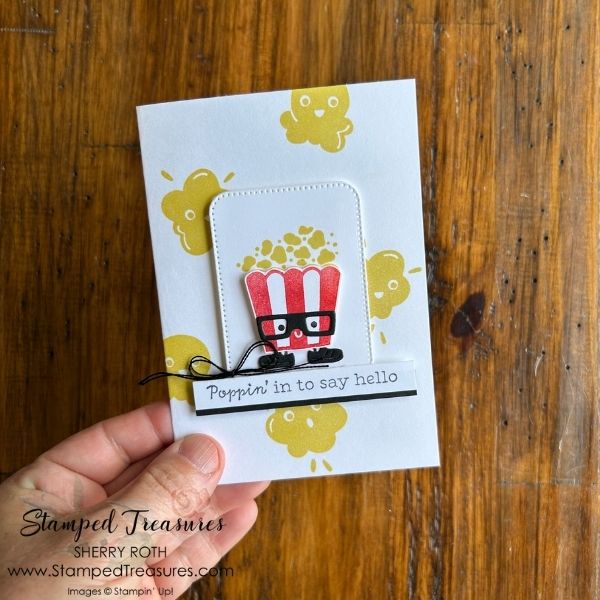
For this first card I used one of Stampin’ Up!’s note cards & envelopes as my base. Don’t have these, you can cut your own (size below) or change it to a regular size handmade card size.
These are the things you’d be looking for:
- a die, or punch, for your focal point. This can be any size or shape.
- a long narrow greeting
- some twine or ribbon
- any stamp set with medium sized images – this can be flowers, leaves, cute critters – anything goes
Measurements:
- Basic White Note Card & Envelope: this comes pre-cut & scored but you can cut your own. Size is 5″ x 7″ and scored at 3-1/2″.
- Basic White: 2″ x 2-3/4″ cut with the 2nd largest rectangle from the Nested Essentials dies; scraps for stamping
- Basic Black: scraps
- Black Twine: 18″
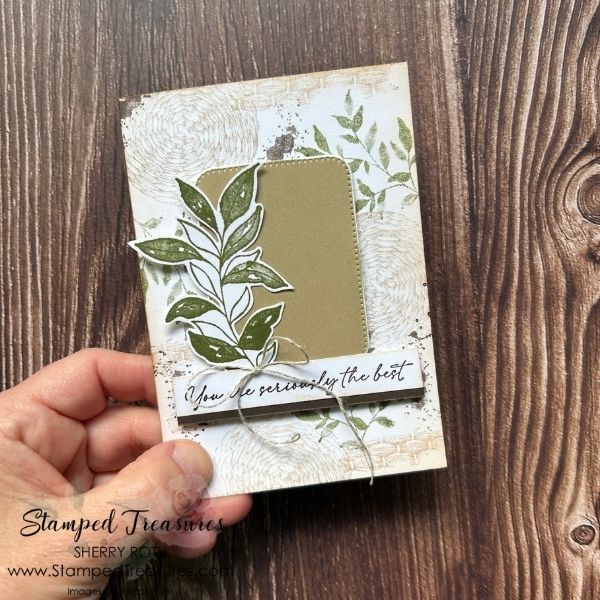
Here’s a look at my alternate. I went with a more vintage look by using the collage stamping technique for my background. You can see that the layout is the same.
Card #2
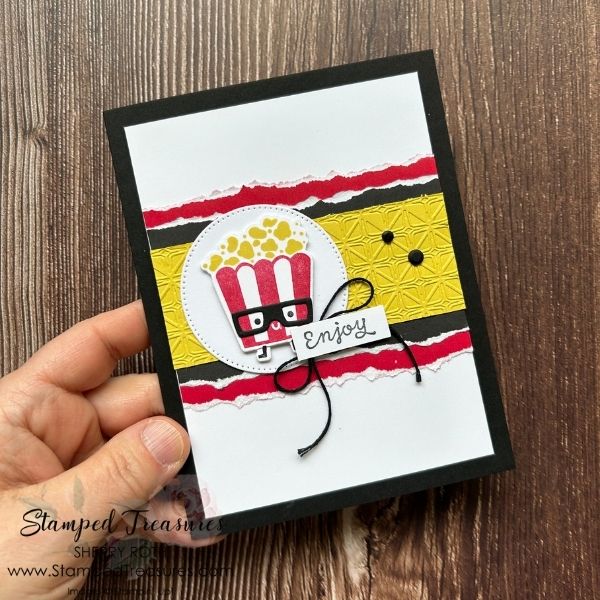
Card #2 uses two tone card stock. If you don’t have two tone card stock, you can replace it with strips of pattern paper or regular card stock. Using pattern paper will still give you the white core when you tear it. You want a punch, or die cut, shape to hold your focal point. It doesn’t have to be a circle, it can be any shape.
Measurements:
- Basic Black: 8-1/2″ x 5-1/2″ scored at 4-1/4″ and scrap for die cutting
- Basic White: 3-3/4″ x 5″ ; 4″ x 5-1/4″ (inside); 2-1/2″ x 2-1/2″ for die cutting a circle; scraps for stamping
- Basic Black Two-Tone: 2″ x 3-3/4″
- Real Red Two-Tone: 2″ x 3-3/4″
- Darling Duckling: 1-1/2″ x 3-3/4″ embossed with Garden & Glass embossing folder
- Black Twine: 8″
- Black Matte Dots: x2
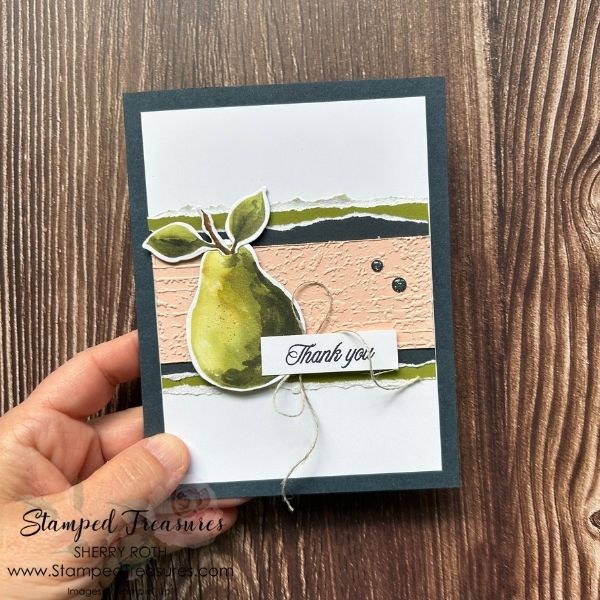
The alternate uses a die cut pear from the Painterly Pear dsp and a greeting from the Perfectly Pears stamp set. The embossing folder, card stock colours, twine and gems were all switched out as well.
Card #3
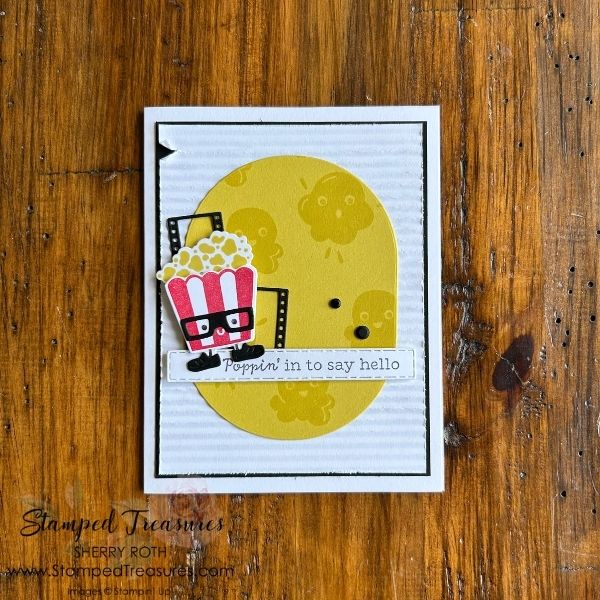
For card #3 you want to find a shape that is a bit larger. If you don’t have a lot of larger dies, you can simply cut a rectangle to replace the oval. You’ll also look for dies, or punches that you could use to add a bit of interest behind your focal point. This is where leaves or sprigs come in handy. These will replace the film strips. In lieu of those, you could simply strategically stamp on the background and use a larger focal point (see the alternate below).
Measurements:
- Thick Basic White: 8-1/2″ x 5-1/2″ scored at 4-1/4″
- Basic Black: 3-7/8″ x 5-1/8″ and scraps for die cutting
- Basic White: 3-3/4″ x 5″ embossed with Mini Corrugated folder; scraps for stamping & die cutting
- Darling Duckling: 3-1/2″ x 4-1/4″ for die cutting oval
I stuck with the chunky oval from the Impressions Abloom dies (I love this die!) but alternated strips of light and dark two tone card stock. Then stamped one of the images from the Gallery Blooms stamp set over top. This is a great way to add a bit of depth to your projects without extra die cut pieces.
I hope you found these tips helpful! Happy crafting.
Until next time,

Shopping List
Click on any of the images to shop my Canadian online store or to find out more information about any of these products.
![Poppin' By Bundle (English) [ 165489 ]](https://assets1.tamsnetwork.com/images/EC042017NF/165489s.jpg "Poppin' By Bundle (English) [ 165489 ]")
![Textured Notes Dies [ 165555 ]](https://assets1.tamsnetwork.com/images/EC042017NF/165555s.jpg "Textured Notes Dies [ 165555 ]")
![Impressions Abloom Dies [ 165610 ]](https://assets1.tamsnetwork.com/images/EC042017NF/165610s.jpg "Impressions Abloom Dies [ 165610 ]")
![Nested Essentials Dies [ 161597 ]](https://assets1.tamsnetwork.com/images/EC042017NF/161597s.jpg "Nested Essentials Dies [ 161597 ]")
![Stylish Shapes Dies [ 159183 ]](https://assets1.tamsnetwork.com/images/EC042017NF/159183s.jpg "Stylish Shapes Dies [ 159183 ]")
![Glass & Gardens Embossing Folders [ 165597 ]](https://assets1.tamsnetwork.com/images/EC042017NF/165597s.jpg "Glass & Gardens Embossing Folders [ 165597 ]")
![Mini Corrugated 3 D Embossing Folder [ 165559 ]](https://assets1.tamsnetwork.com/images/EC042017NF/165559s.jpg "Mini Corrugated 3 D Embossing Folder [ 165559 ]")
![Baker's Twine Essentials Pack [ 155475 ]](https://assets1.tamsnetwork.com/images/EC042017NF/155475s.jpg "Baker's Twine Essentials Pack [ 155475 ]")
![Neutral Matte Dots [ 165561 ]](https://assets1.tamsnetwork.com/images/EC042017NF/165561s.jpg "Neutral Matte Dots [ 165561 ]")
![Real Red 12" X 12" (30.5 X 30.5 Cm) Two Tone Cardstock [ 166696 ]](https://assets1.tamsnetwork.com/images/EC042017NF/166696s.jpg "Real Red 12\" X 12\" (30.5 X 30.5 Cm) Two Tone Cardstock [ 166696 ]")
![Basic Black 12" X 12" (30.5 X 30.5 Cm) Two Tone Cardstock [ 166704 ]](https://assets1.tamsnetwork.com/images/EC042017NF/166704s.jpg "Basic Black 12\" X 12\" (30.5 X 30.5 Cm) Two Tone Cardstock [ 166704 ]")
![Basic White Note Cards & Envelopes [ 159232 ]](https://assets1.tamsnetwork.com/images/EC042017NF/159232s.jpg "Basic White Note Cards & Envelopes [ 159232 ]")
![Basic White 8 1/2" X 11" Cardstock [ 166780 ]](https://assets1.tamsnetwork.com/images/EC042017NF/166780s.jpg "Basic White 8 1/2\" X 11\" Cardstock [ 166780 ]")
![Basic Black 8-1/2" X 11" Cardstock [ 121045 ]](https://assets1.tamsnetwork.com/images/EC042017NF/121045s.jpg "Basic Black 8-1/2\" X 11\" Cardstock [ 121045 ]")
![Darling Duckling 8 1/2" X 11" Cardstock [ 165622 ]](https://assets1.tamsnetwork.com/images/EC042017NF/165622s.jpg "Darling Duckling 8 1/2\" X 11\" Cardstock [ 165622 ]")
![Darling Duckling Classic Stampin' Pad [ 165277 ]](https://assets1.tamsnetwork.com/images/EC042017NF/165277s.jpg "Darling Duckling Classic Stampin' Pad [ 165277 ]")
![Basic Black Stampin' Write Marker [ 162481 ]](https://assets1.tamsnetwork.com/images/EC042017NF/162481s.jpg "Basic Black Stampin' Write Marker [ 162481 ]")
![Blender Pens [ 102845 ]](https://assets1.tamsnetwork.com/images/EC042017NF/102845s.jpg "Blender Pens [ 102845 ]")
![Real Red Classic Stampin' Pad [ 147084 ]](https://assets1.tamsnetwork.com/images/EC042017NF/147084s.jpg "Real Red Classic Stampin' Pad [ 147084 ]")
![Tuxedo Black Memento Ink Pad [ 132708 ]](https://assets1.tamsnetwork.com/images/EC042017NF/132708s.jpg "Tuxedo Black Memento Ink Pad [ 132708 ]")
![Basic White 8 1/2" X 11" Thick Cardstock [ 159229 ]](https://assets1.tamsnetwork.com/images/EC042017NF/159229s.jpg "Basic White 8 1/2\" X 11\" Thick Cardstock [ 159229 ]")
![Multipurpose Liquid Glue [ 110755 ]](https://assets1.tamsnetwork.com/images/EC042017NF/110755s.jpg "Multipurpose Liquid Glue [ 110755 ]")
![Stampin' Dimensionals [ 104430 ]](https://assets1.tamsnetwork.com/images/EC042017NF/104430s.jpg "Stampin' Dimensionals [ 104430 ]")
![Stampin' Cut & Emboss Machine [ 149653 ]](https://assets1.tamsnetwork.com/images/EC042017NF/149653s.jpg "Stampin' Cut & Emboss Machine [ 149653 ]")


Leave a Reply