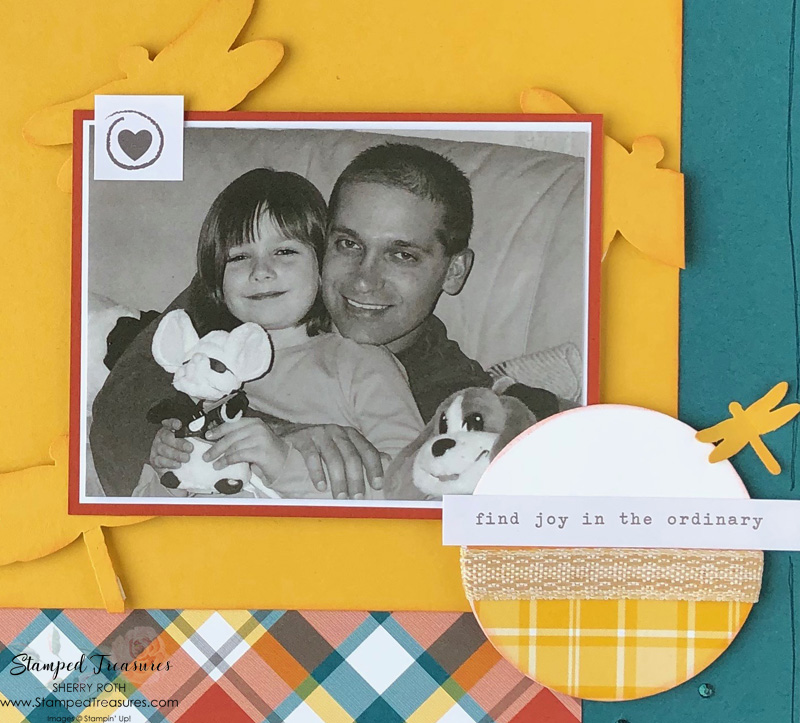
Have you ever tried creating scrapbook page kits? There are times when I am looking for something fun to do but am just not in the mood to get crafty. This is when I’ll pull out some supplies and create page kits.
What is a page kit?
It might mean something different to other people but when I refer to a page kit, it’s where I pull out some supplies, a photo, and possibly a sketch and tuck them into a page protector. The supplies could include card stock, patterned paper, die cuts, stickers, ribbon, embellishments – anything that I will think would work for the photo I’ve chosen.
Why create page kits?
Page kits serve several purposes. I would say the biggest appeal to me is that they make for quick and easy layouts. You’ve already done all the prep work for the layout so they usually come together quite quickly. My memory keeping Monday posts are often the result of page kits that I’ve put together.
Secondly, if you go on crafting retreats, page kits save having to bring everything with you. It’s like having a detailed plan in place.
Thirdly, I find page kits a perfect way to reconnect with your supplies. Creating them gives you the opportunity to go through your supplies and pull out things that you may have forgotten about. We all have supplies that are our ‘go to’ supplies. I find that when I create page kits I tend to go to my bin of leftover die cuts, random stickers, scraps of patterned paper, remnants of ribbon and leftover Paper Pumpkin pieces.
And lastly I find creating them relaxing and fun. It uses the creative side of your brain but in a different way than if you were actually creating the layout. At my last retreat, I needed a bit of a break from crafting so I decided to put some page kits together. Todays layout and this layout from a couple weeks ago are both the result of those page kits I created.
For this layout I tucked the following supplies into my page protector:
- 12″ x 12″ pretty peacock Cardstock – for the background
- one 6″ x 6″ piece of the plaid tidings dsp (the colourful one)
- scraps of the bumblebee plaid dsp
- a couple punched circles
- some pretty peacock rhinestones that I had coloured with my blends probably over a year ago and never used
- a scrap of the embroidered ribbon
- the wood word ‘Life’
- a scrap of bumblebee cardstock
- some punched bumblebee dragonflies
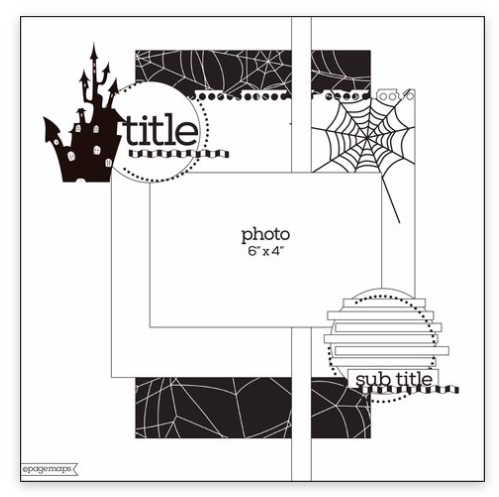
- and the sketch below
The sketch helps to remind me of what my plan was when I pulled out all the supplies. Because sometimes it’s months before I create the layouts for the kits that I created. It’s easy to forget what you had in mind.
When you sit down to create the layout from your page kit, you are still going to find that you pull out additional supplies and that’s ok. The kit isn’t meant to be complete. But it does help that so many of the decisions are already made for you.
I hope that you found this post on creating scrapbook page kits helpful. I’d love to hear if you end up creating some!
Have a creative day!

Shopping List
Click on any of the images below to shop my Canadian online store. In addition to the following supplies, I also used: a dragonfly punch (to be released in January); word stickers and the ‘life’ wood piece.


Leave a Reply